DIY Low-Voltage Landscape Lighting Install Guide
A well-lit yard does two things at once: it looks intentional and it makes navigating paths after dark actually safe. Low-voltage landscape lighting is one of those projects that sounds technical but is genuinely beginner-friendly once you understand what each component does.
The system runs on 12 volts, which means you are not dealing with high-voltage wiring that requires a licensed electrician. You plug a transformer into a standard outdoor outlet, run wire underground or under mulch, and snap fixtures into place with piercing connectors. Most people finish a solid front-yard installation in an afternoon.
This guide covers every component you actually need, from the transformer that powers the whole system to the specific fixtures for paths, garden beds, and trees. Products are sized for a typical install covering 150 to 200 feet of pathway.
Best Transformer for a DIY System
The transformer is the single most important purchase in any low-voltage lighting project. Buy one that is too small and you will constantly redo your math every time you add a fixture. Buy one with a built-in timer and photocell and you eliminate a separate smart plug or manual switch.
The VOLT Lighting 150-Watt Multi-Tap transformer covers a solid mid-sized yard with room to grow. It has multiple 12V output taps, which lets you wire different zones at slightly different voltages to compensate for wire length. Fixtures 100 feet from the transformer see slightly lower voltage than fixtures 20 feet away, and those multi-tap outputs let you dial that in without buying separate equipment.
Setup takes about 20 minutes. Mount it near your outdoor outlet, program the timer through the digital display, and you are done with this step. If you expect to add lights in year two or three, the 300W version of the same line uses the same interface and wiring method.
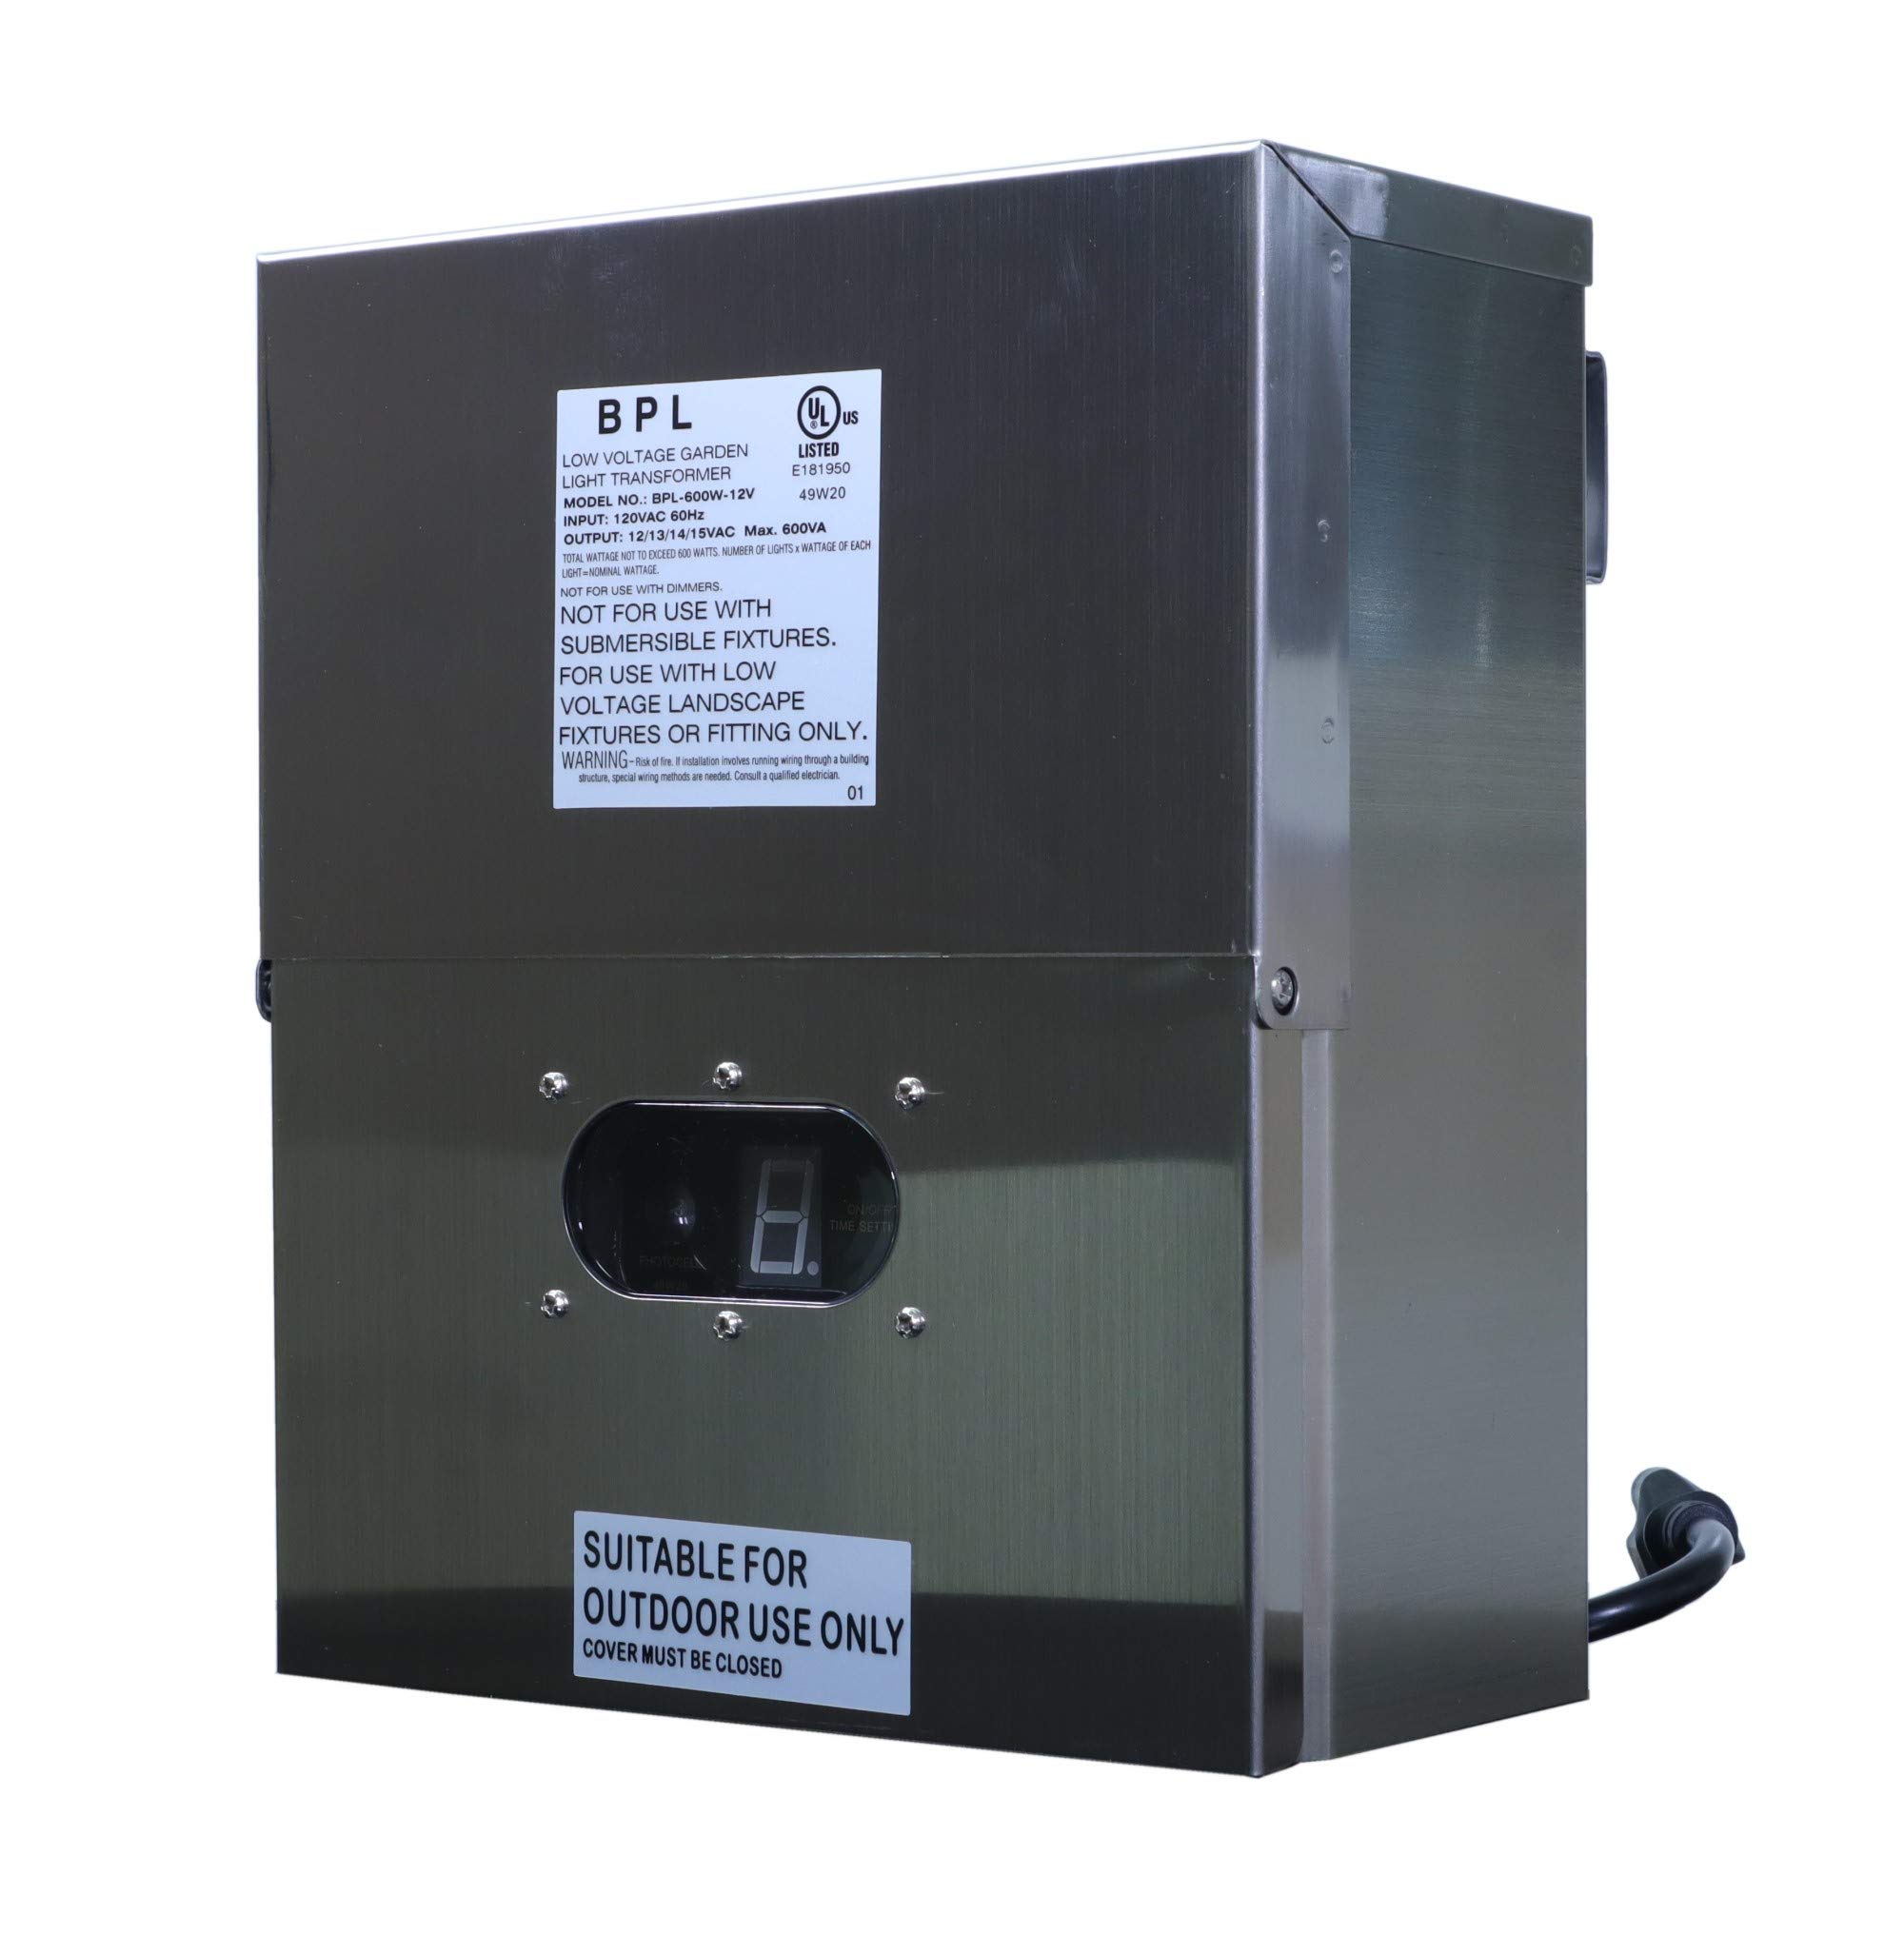
VOLT Lighting 150-Watt Multi-Tap Low Voltage Landscape Transformer with Timer and Photocell
$149
2,100+ reviews
Multiple 12V output taps let you fine-tune voltage across zones, while the built-in photocell and programmable timer handle daily scheduling automatically.
Shop on Amazon →Best Pathway Lights for Walkways and Driveways
Malibu makes some of the most widely installed pathway lights in the country, and the 8-pack LED set is the easiest way to get a walk lit without overthinking it. Each fixture is a stake-mount design that pushes into the ground, clips onto the wire with a built-in piercing connector, and holds position even in clay soil.
The LED bulbs are rated for 50,000 hours, which means you are not replacing them for a very long time. Spacing them 6 to 8 feet apart on a standard walkway gives even coverage without the cluttered look you get when lights are too close together. Eight fixtures covers roughly 50 to 60 feet of path, enough for most front walks plus a side gate.
One honest note: Malibu fixtures are plastic, and the stems can flex if someone steps on them. They are not premium products. But for front-yard paths where foot traffic stays on the pavement, they hold up fine and the price makes it easy to do the whole yard in one order.

Malibu 8401-4101-08 8-Pack LED Low Voltage Landscape Path Light Set
$54
6,400+ reviews
Eight stake-mount LED path lights with built-in wire connectors, 50,000-hour rated bulbs, and a dark bronze finish that blends into mulch.
Shop on Amazon →Best Premium Path Lights for Garden Beds
If the Malibu lights are for the front walk, Kichler's low-voltage path lights are for the spots people actually look at. They are full-metal construction with a dark bronze powder coat, and they cast a much more refined spread of light than plastic budget options. These are the kind of fixture you stop noticing because they just look like they belong.
The 15067AZT is a direct-burial stake design with a solid brass socket. It takes a standard MR16 bulb, which means you can swap to a warmer or cooler color temperature without replacing the fixture. For a curved garden bed, two or three of these staggered in a loose arc read as intentional rather than symmetrical.
Install them the same way as any stake light: clip onto the main wire run, push the stake into the bed, and angle the head toward the plants or structure you want to highlight. They pair especially well with spotlights on trees a few feet away, where the combination of low spread light and vertical uplight creates actual depth.
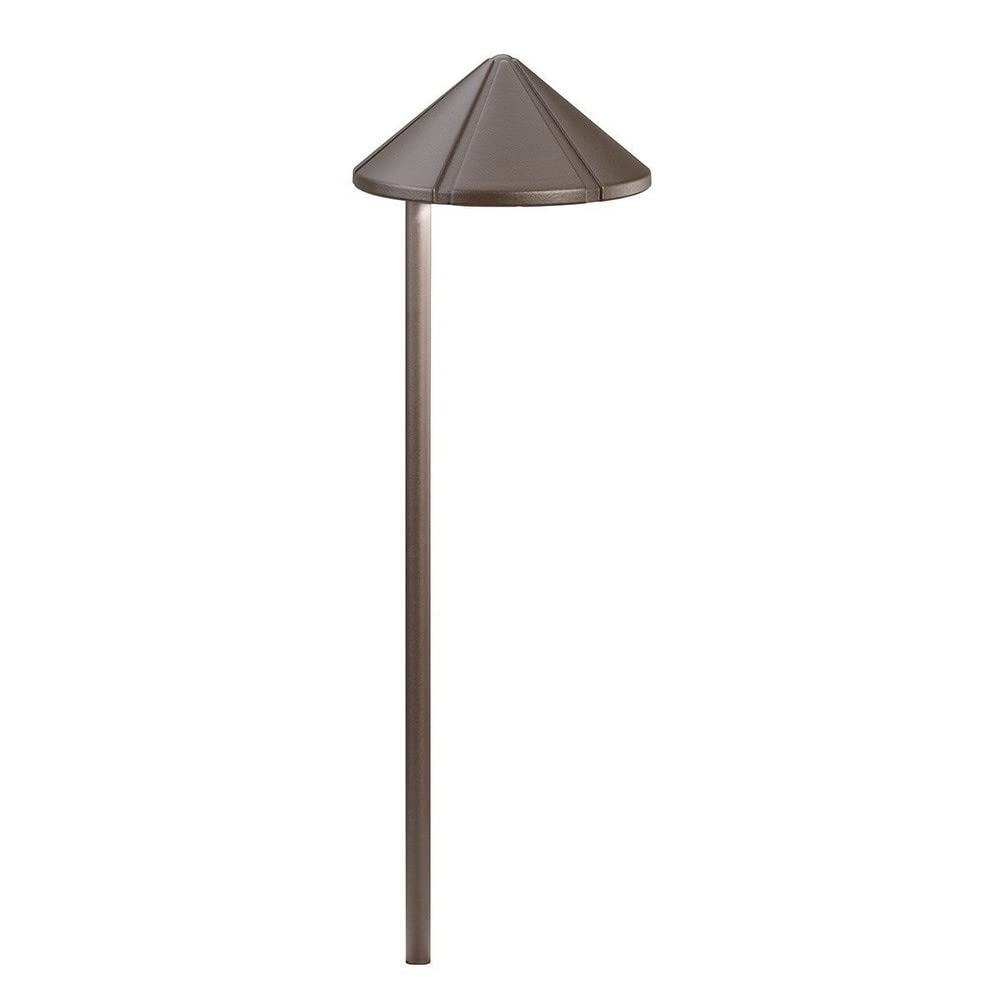
Kichler 15067AZT Low Voltage Path and Spread Light Bronze
$44
1,800+ reviews
Full-metal construction, dark bronze finish, and an MR16 socket that accepts standard landscape bulbs for easy color-temperature swaps.
Shop on Amazon →Best Spotlights for Uplighting Trees and Structures
Uplighting a mature tree or the front gable of a house is the move that makes a yard look professionally designed. You push the spike into the ground at the base of the tree, angle the head, and the beam travels up the trunk and through the canopy. A mature oak or maple with an uplight underneath it at 9 PM looks completely different from the same tree in daylight.
The Hampton Bay 6-watt LED low-voltage spotlight is a reliable choice for this. The 4-pack makes it easy to do a full front yard, and the adjustable spike lets you dial in the angle after you see how the light actually falls at night. Do not aim these straight up. Angle them 15 to 20 degrees off vertical to avoid blowing out the bark and losing the dimensional effect.
Wire these on a separate tap from your path lights if your transformer supports it. Path lights typically look right at a slightly lower voltage, while spotlights benefit from a higher tap output. A 5-minute adjustment at the transformer box is worth doing once you have seen the difference.

Hampton Bay 6-Watt Low Voltage Black LED Outdoor Landscape Spotlight (4-Pack)
$68
4,100+ reviews
Four adjustable-head LED spotlights with spike mounts, ideal for uplighting trees, shrubs, and architectural features on a standard 10x12 transformer zone.
Shop on Amazon →Best Wire for Running the Main Line
Most starter kits ship with a small spool of 16-gauge wire, which works fine for short runs close to the transformer. Once you are running 75 feet or more, you need 12-gauge wire to avoid voltage drop that visibly dims fixtures at the far end of the run. Southwire's 12/2 landscape lighting wire is the standard choice for longer zones.
The 100-foot spool covers most single-zone front yards. For a full front-and-back-yard install, buy two spools. Bury the wire 3 to 6 inches deep using a flat spade: press the blade into the turf at an angle, slip the wire into the gap, and press the turf closed. No trenching required for most installations.
Use the snap-on piercing connectors that come with your fixtures rather than stripping and twisting wire together. Piercing connectors hold better over time and are far less likely to introduce a weak connection that slowly dims one zone over a season. Keep a handful of extras in a bag in the garage for when you add fixtures later.
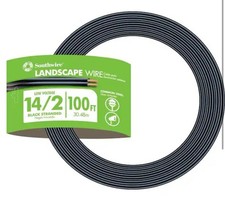
Southwire 55213243 12-Gauge 2-Conductor Low Voltage Landscape Lighting Wire 100 ft.
$28
5,600+ reviews
100 feet of 12/2 direct-burial landscape wire with a UV-resistant jacket, the right gauge for runs beyond 50 feet from the transformer.
Shop on Amazon →Quick Tips for Installing Landscape Lighting
- Start with a watt count. Add up the wattage of every fixture you plan to install, then buy a transformer rated for at least 25% more than that total. You will add lights later.
- Use the T-method for wire routing. Run one wire in each direction from the transformer rather than a single long loop. This keeps voltage consistent across both sides of the run.
- Test at night before you bury anything. Lay the wire on the surface, plug in the transformer, and walk the yard after dark. Adjust fixture positions while you still can move everything freely.
- Space path lights visually, not by ruler. On a curved path, follow the curve. Visually even spacing reads better than mathematically equal spacing once you are looking at it in person.
- Warm white beats cool white outdoors. Look for bulbs in the 2700K to 3000K range. Cool-white LEDs read clinical in a garden setting, especially around plants and wood.
- Photograph the wire layout before covering it. Take a quick phone photo of the full wire run from above. You will thank yourself the next time you dig to plant a shrub or run irrigation.
Frequently Asked Questions
How many lights can I run on a low-voltage transformer?
Divide the transformer's wattage rating by the wattage of your individual fixtures. A 150W transformer can handle thirty 5-watt path lights in theory, but stay under 80% of rated capacity so the transformer runs cool. That works out to no more than 120W of fixtures on a 150W unit.
Do I need to bury low-voltage landscape wire?
Technically no, but you should. Wire left on the surface gets cut by mowers and damaged by foot traffic within one season. Three to six inches deep is enough to protect it without needing a trenching tool.
What gauge wire should I use for landscape lighting?
Use 16-gauge for runs under 50 feet from the transformer. For anything longer, use 12-gauge to avoid voltage drop that dims fixtures at the far end. Most kit wire is 16-gauge, which is why buying a separate spool of 12-gauge pays off on larger yards.
How far apart should landscape path lights be spaced?
Six to eight feet apart is the standard for most path lights. Closer than six feet looks cluttered and wastes fixtures. Wider than ten feet leaves dark gaps between pools of light. Adjust based on the actual beam width of your specific fixture.
Can low-voltage landscape lighting work with a smart home?
Yes. The simplest approach is plugging a standard transformer into a smart outdoor outlet, which lets you control it by voice or app. For zone-level control, look for a smart transformer with a WiFi timer built in.