How to Lay Stepping Stones in Your Garden Path
A stepping stone path is one of the best weekend projects you can do in a backyard. It solves a real problem, worn grass, muddy shortcuts, undefined zones, and it makes the whole yard feel more considered without hiring anyone.
You do not need special skills. You need a plan, a solid base, and about two days. The first day is prep and layout. The second day is setting stones and filling gaps. After that you have a path that holds up for decades.
This guide walks through every step, from marking the route to choosing what goes between stones. Along the way are four products that genuinely make the job easier and the result more polished.
Best Concrete Form for DIY Stepping Stones
If you want full control over the look and size of your stones, making them yourself with a pour mold is the right move. The QUIKRETE Walkmaker lets you mix concrete, fill the form, and create flagstone or cobblestone patterns directly in place. You peel it up after a few minutes and reposition it, so you can cover an entire path in sections without casting individual stones elsewhere and hauling them.
For a 20-foot path, you can finish the pour in a single afternoon. The stones end up about two inches thick, which is plenty stable for foot traffic. The form comes in a few patterns, and the flagstone option looks surprisingly natural once it cures and ages a bit. You can tint the concrete mix with pigment for a more custom look, or leave it gray and let moss find its way into the texture over time.
This works especially well on curved or irregular paths because you are building the shape as you go rather than cutting hard materials. Mark your route with a garden hose first, then follow that line with the form.
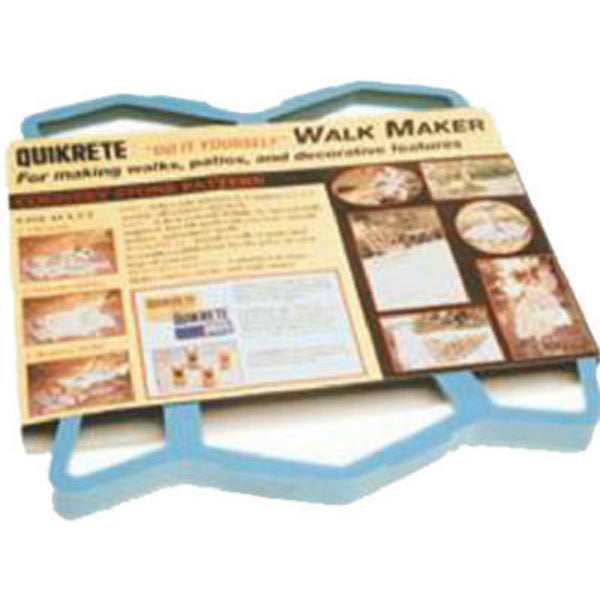
QUIKRETE Walkmaker Reusable Plastic Concrete Form
$36
3,800+ reviews
A reusable pour form that creates flagstone or cobblestone patterns in concrete directly on the ground, no cutting or hauling required.
Shop on Amazon →Best Landscape Fabric for Under Stepping Stones
Weed barrier fabric is not optional if you want a path that stays clean without constant maintenance. Without it, grass and weeds push up through the gravel base and between stones within a single season. The Scotts Pro 25-Year Landscape Fabric is heavier than the thin rolls at garden centers, and it actually blocks light effectively instead of just slowing weeds down for a summer.
Cut it to cover the full path width plus a few extra inches on each side. You can overlap sections by six inches without losing any effectiveness. Pin it down with landscape staples before adding gravel on top. If you are using pea gravel or decomposed granite as fill between stones, the fabric underneath keeps it from sinking into the soil over time and losing depth.
For a typical 18-inch wide path, a 4-foot by 50-foot roll covers about 33 linear feet with comfortable overlap on both sides. That is more than enough for most backyard paths, with material left over for garden beds.
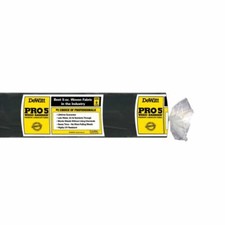
Scotts 25-Year Pro Landscape Fabric Weed Barrier, 4 ft x 50 ft
$28
11,400+ reviews
Heavy-duty woven landscape fabric rated for 25 years, thick enough to actually block weeds rather than just slow them down for one season.
Shop on Amazon →Best Sand for Leveling and Setting Stones
Every stone needs a level bed to sit in. If you skip this step or rush it, stones rock underfoot and eventually crack or tip. A two-inch layer of coarse sand under each stone gives you something to press and wiggle the stone into, so you can dial in the level precisely. Coarse sand is easier to work with than fine play sand because it holds position better once packed.
QUIKRETE All-Purpose Sand is the standard choice for this work. For a 15-foot path with 12-inch stones, figure on two to three 50-pound bags. That sounds like a lot but each bag is manageable and you only need about two inches under each stone.
Dampen the sand slightly before setting stones on it. Dry sand shifts too freely and you will spend twice as long leveling. A light spray from a hose and a few minutes to absorb makes it behave much more like packed soil.
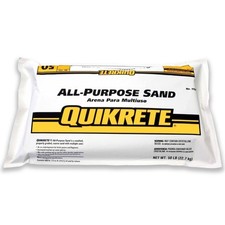
QUIKRETE All-Purpose Sand, 50 lb
$9
6,200+ reviews
Coarse, consistent sand that creates a stable, adjustable leveling bed for flagstone and concrete pavers.
Shop on Amazon →Best Rubber Mallet for Tapping Stones Into Place
A rubber mallet is how you actually set stones into the sand bed without cracking them or bruising your palm. The goal is to tap the high corner of each stone down until a two-foot level reads flat across the top. This takes more patience than force, and a good mallet gives you controlled impact rather than random blows from a metal hammer.
The Estwing Sure Strike rubber mallet has a solid core and a heavy enough head to move a 20-pound flagstone without needing to wind up. The fiberglass handle absorbs shock well and will not split after a season in the garage. It is also the right tool for tapping in landscape staples when you are laying the weed barrier.
One mallet covers the whole project. If you already own a standard hammer and think you can substitute it, you will regret it. Stone cracks more easily than expected when metal hits it directly.
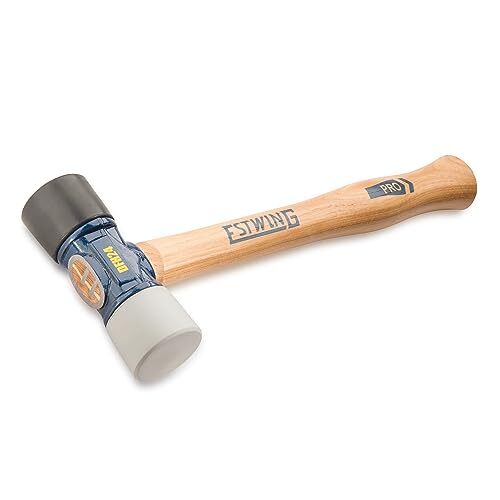
Estwing Sure Strike Rubber Mallet, 22 oz
$24
5,600+ reviews
A 22-oz fiberglass-handle rubber mallet that delivers controlled impact for leveling stones without cracking them.
Shop on Amazon →Quick Tips for Laying a Stepping Stone Path
- Mark your path with a garden hose first. Lay a hose down to trace your desired route before digging anything. Walk it a few times to see if the curves feel natural and the spacing matches your stride.
- Dig deeper than you think you need to. You need three to four inches of depth for a gravel base, sand, and the stone itself. Shallow beds lead to stones that sink and tip after the first hard winter.
- Space stones for a natural stride. Most adults step comfortably at 18 to 24 inches on center. Lay the stones out on top of the grass first and walk the path before committing to any spacing.
- Keep each stone slightly above grade. Set stones about a quarter inch above the surrounding soil. They will settle a bit over time, and this small buffer prevents water from pooling on the path surface.
- Fill gaps with creeping thyme or pea gravel. Both look good and are easy to maintain. Creeping thyme fills in over one or two seasons and tolerates light foot traffic. Pea gravel is immediate and works especially well over a landscape fabric base.
- Check level in two directions on every stone. Level side to side and front to back before moving on. A stone that passes one direction but fails the other will still rock underfoot and become a trip hazard over time.
Frequently Asked Questions
Do I need gravel under stepping stones?
A gravel base is strongly recommended. It improves drainage, prevents stones from sinking into soft soil, and gives you a stable surface for the sand leveling layer. Two inches of gravel under two inches of sand is the standard approach for a path that lasts.
What do I put between stepping stones?
Pea gravel, decomposed granite, mulch, or low-growing ground covers like creeping thyme all work well. Pea gravel is the easiest to install immediately. Creeping thyme looks the most natural but takes a season to fill in fully.
How deep do I need to dig for a stepping stone path?
Plan on digging four to five inches below your desired finished surface. That accounts for two inches of gravel, two inches of sand, and enough room for the stone to sit just slightly above grade.
How far apart should stepping stones be?
Most paths use 18 to 24 inches measured center to center. The best way to dial it in is to lay the stones on the grass and walk the path a few times before setting anything permanently.
Can I lay stepping stones over existing grass?
Not if you want them to stay level. You need to remove the sod and several inches of soil to create a proper gravel and sand base. Laying stones directly on grass leads to settling and tipping within a year.