How to Build a Fire Pit Patio with Pavers
A flat patch of grass is a terrible place to put a fire pit. Chairs sink, ash blows around, and the whole setup feels temporary. A proper paver patio changes that completely, giving you a level, defined space that looks intentional and holds up for years.
This isn't a weekend project you'll regret starting. With the right prep and the right materials, a 10x10 or 12x12 paver patio is completely doable for someone with no masonry experience. The learning curve is mostly in the base work, not the pavers themselves.
Below is a walkthrough of the five materials and tools that make the biggest difference in getting this done right. Skip any of them and you'll be relaying pavers in two years.
Start Here: Weed Barrier That Actually Holds
The most common mistake people make on paver patios is skipping the weed barrier or using a cheap version that degrades in two seasons. Water works its way through any base layer, and without a solid barrier underneath, you'll have grass and weeds pushing up through your paver joints within a year.
DeWitt's Sunbelt Weed Barrier is one of the few landscape fabrics that actually holds up under a gravel base and foot traffic over time. It's a 4-ounce woven polypropylene fabric, which means it lets water drain through but blocks everything that wants to grow. Cut it a foot wider than your planned patio perimeter on all sides. You can fold or trim the edges once the edging goes in.
For a 12x12 fire pit patio, you'll need about 150-200 square feet with overhang. Lay it directly on your excavated, raked soil before you bring in any base material. Overlap seams by at least 6 inches if you're piecing multiple sections.
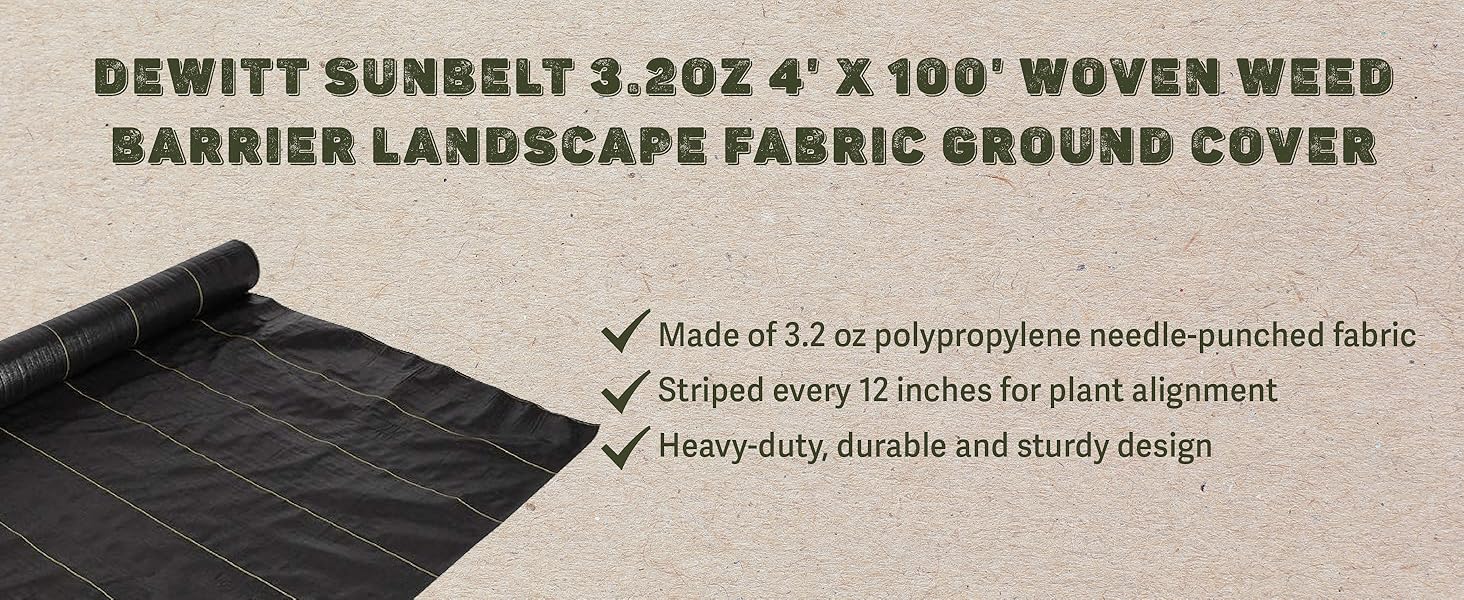
DeWitt 4 oz. Sunbelt Weed Barrier Landscape Fabric
$28
2,800+ reviews
Heavy-duty woven polypropylene that drains water freely while blocking weeds for the long haul.
Shop on Amazon →Compacting the Base So Nothing Shifts Later
Your base layer is everything. Most guides say to use 4 inches of compacted gravel base, and they're right. But what they don't always emphasize is that loose gravel dumped in and covered with sand is going to settle unevenly, especially under the weight of a steel fire pit and six chairs.
Renting a plate compactor is worth it for larger patios, but for a 10x10 or 12x12 project, the Ames True Temper hand tamper does the job well. You work in layers, adding 2 inches of gravel base at a time and tamping it down before adding more. The fiberglass handle absorbs the shock better than wood, and the poly head won't chip or crack on stone.
Plan to spend about an hour on this step. It's tedious but it's the reason your patio stays level after the first winter freeze-thaw cycle. Every inch you rush here will show up as a rocking paver twelve months later.

Ames True Temper 34 in. Poly Fiberglass Handle Hand Tamper
$44
890+ reviews
Fiberglass handle with a weighted poly head, solid enough for compacting gravel base in sections without renting a plate compactor.
Shop on Amazon →Keeping the Edges Clean and the Pavers Contained
Paver edging is the thing holding your entire patio together from the outside. Without it, the outermost row of pavers has nothing to push against and will slowly migrate outward over time, pulling the pattern apart. It's one of those products that does nothing visible but prevents a lot of visible problems.
Dimex EasyFlex No-Dig edging is the standard for DIY paver projects for good reason. It installs with landscape spikes instead of trenching, and the flexible design handles curves and rounded corners easily. If you're planning a circular patio design around the fire pit, this is especially important since rigid edging won't follow the curve.
One 40-foot kit handles a 10x10 square with a little left over. For a 12x12 or anything with a rounded perimeter, buy two kits. Install it flush with the top of your paver surface, not proud of it, so there's no tripping edge and water runs off the patio cleanly.
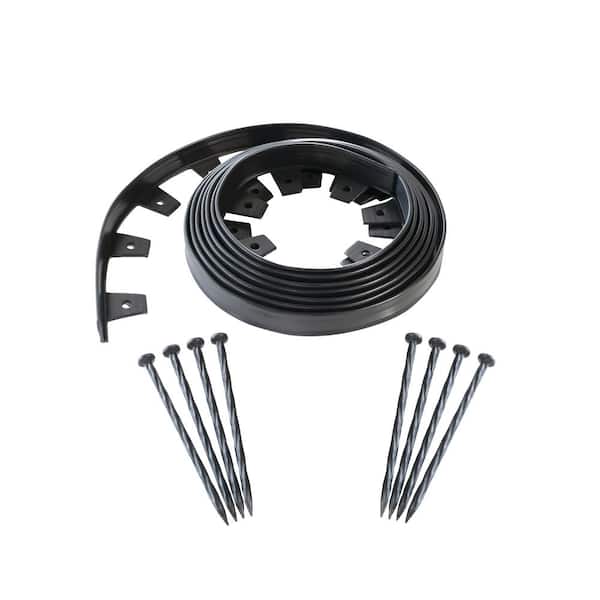
Dimex EasyFlex 40-ft No-Dig Plastic Landscape Edging Kit
$42
4,100+ reviews
Spike-in installation with no trenching required, and flexible enough to follow curves around a circular fire pit patio.
Shop on Amazon →Locking the Joints So Weeds and Ants Can't Move In
Regular sand in paver joints washes out within a season and becomes an ant highway shortly after. Polymeric sand is the upgrade that makes your joints permanent. It goes in dry, you lightly mist it with water, and it activates a binder that hardens the sand in place. The joints end up almost as solid as the pavers themselves.
QUIKRETE's Polymeric Jointing Sand is widely available and works reliably on both natural stone and concrete pavers with joints up to half an inch wide. You sweep it into the joints with a broom, blow or brush off the excess from the paver surface before wetting, and then mist it in two passes to activate the binder. Don't soak it. A fine mist is all it needs.
One 50-pound bag covers roughly 40-50 square feet depending on your joint width and paver thickness. For a 10x10 patio, two bags is usually enough. For a 12x12 with wider joints or thicker pavers, budget three. Get it right the first time and you won't be touching those joints for five-plus years.
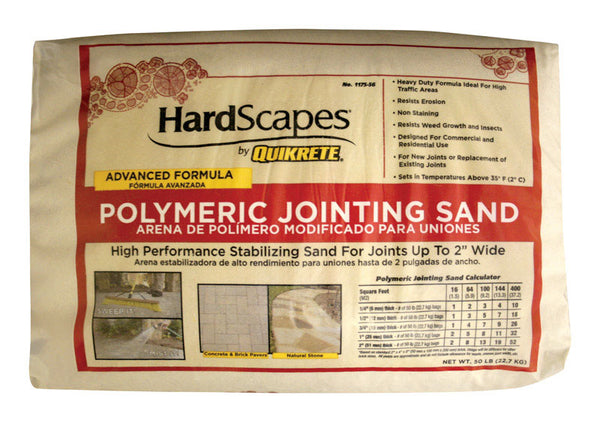
QUIKRETE 50 lb. Polymeric Jointing Sand
$32
3,200+ reviews
Water-activated binder locks paver joints solid to prevent washout, weeds, and ant tunneling.
Shop on Amazon →The Fire Pit That Belongs in the Center of All This Work
Once you've put in the work to build a proper paver patio, the fire pit sitting in the middle should match that energy. The Sunnydaze 36-Inch Heavy-Duty Steel Crosshatch Fire Pit is built for permanent placement on a patio. The crosshatch design has enough visual weight to anchor a 12x12 space, and the included spark screen and poker mean you're not sourcing those separately.
At 36 inches across, it comfortably handles a standard load of split firewood and gives you a fire that's visible to everyone seated around it. Six chairs fit around it easily with 3-4 feet of clearance on all sides, which is both comfortable and within the recommended 10-foot safety perimeter from any combustible structures.
The steel legs elevate the bowl off the paver surface, which matters. Direct contact between a hot fire pit and concrete pavers causes thermal cracking over time. Even a few inches of air gap is enough to protect your new patio. Sunnydaze's logs stand are included for exactly this reason.
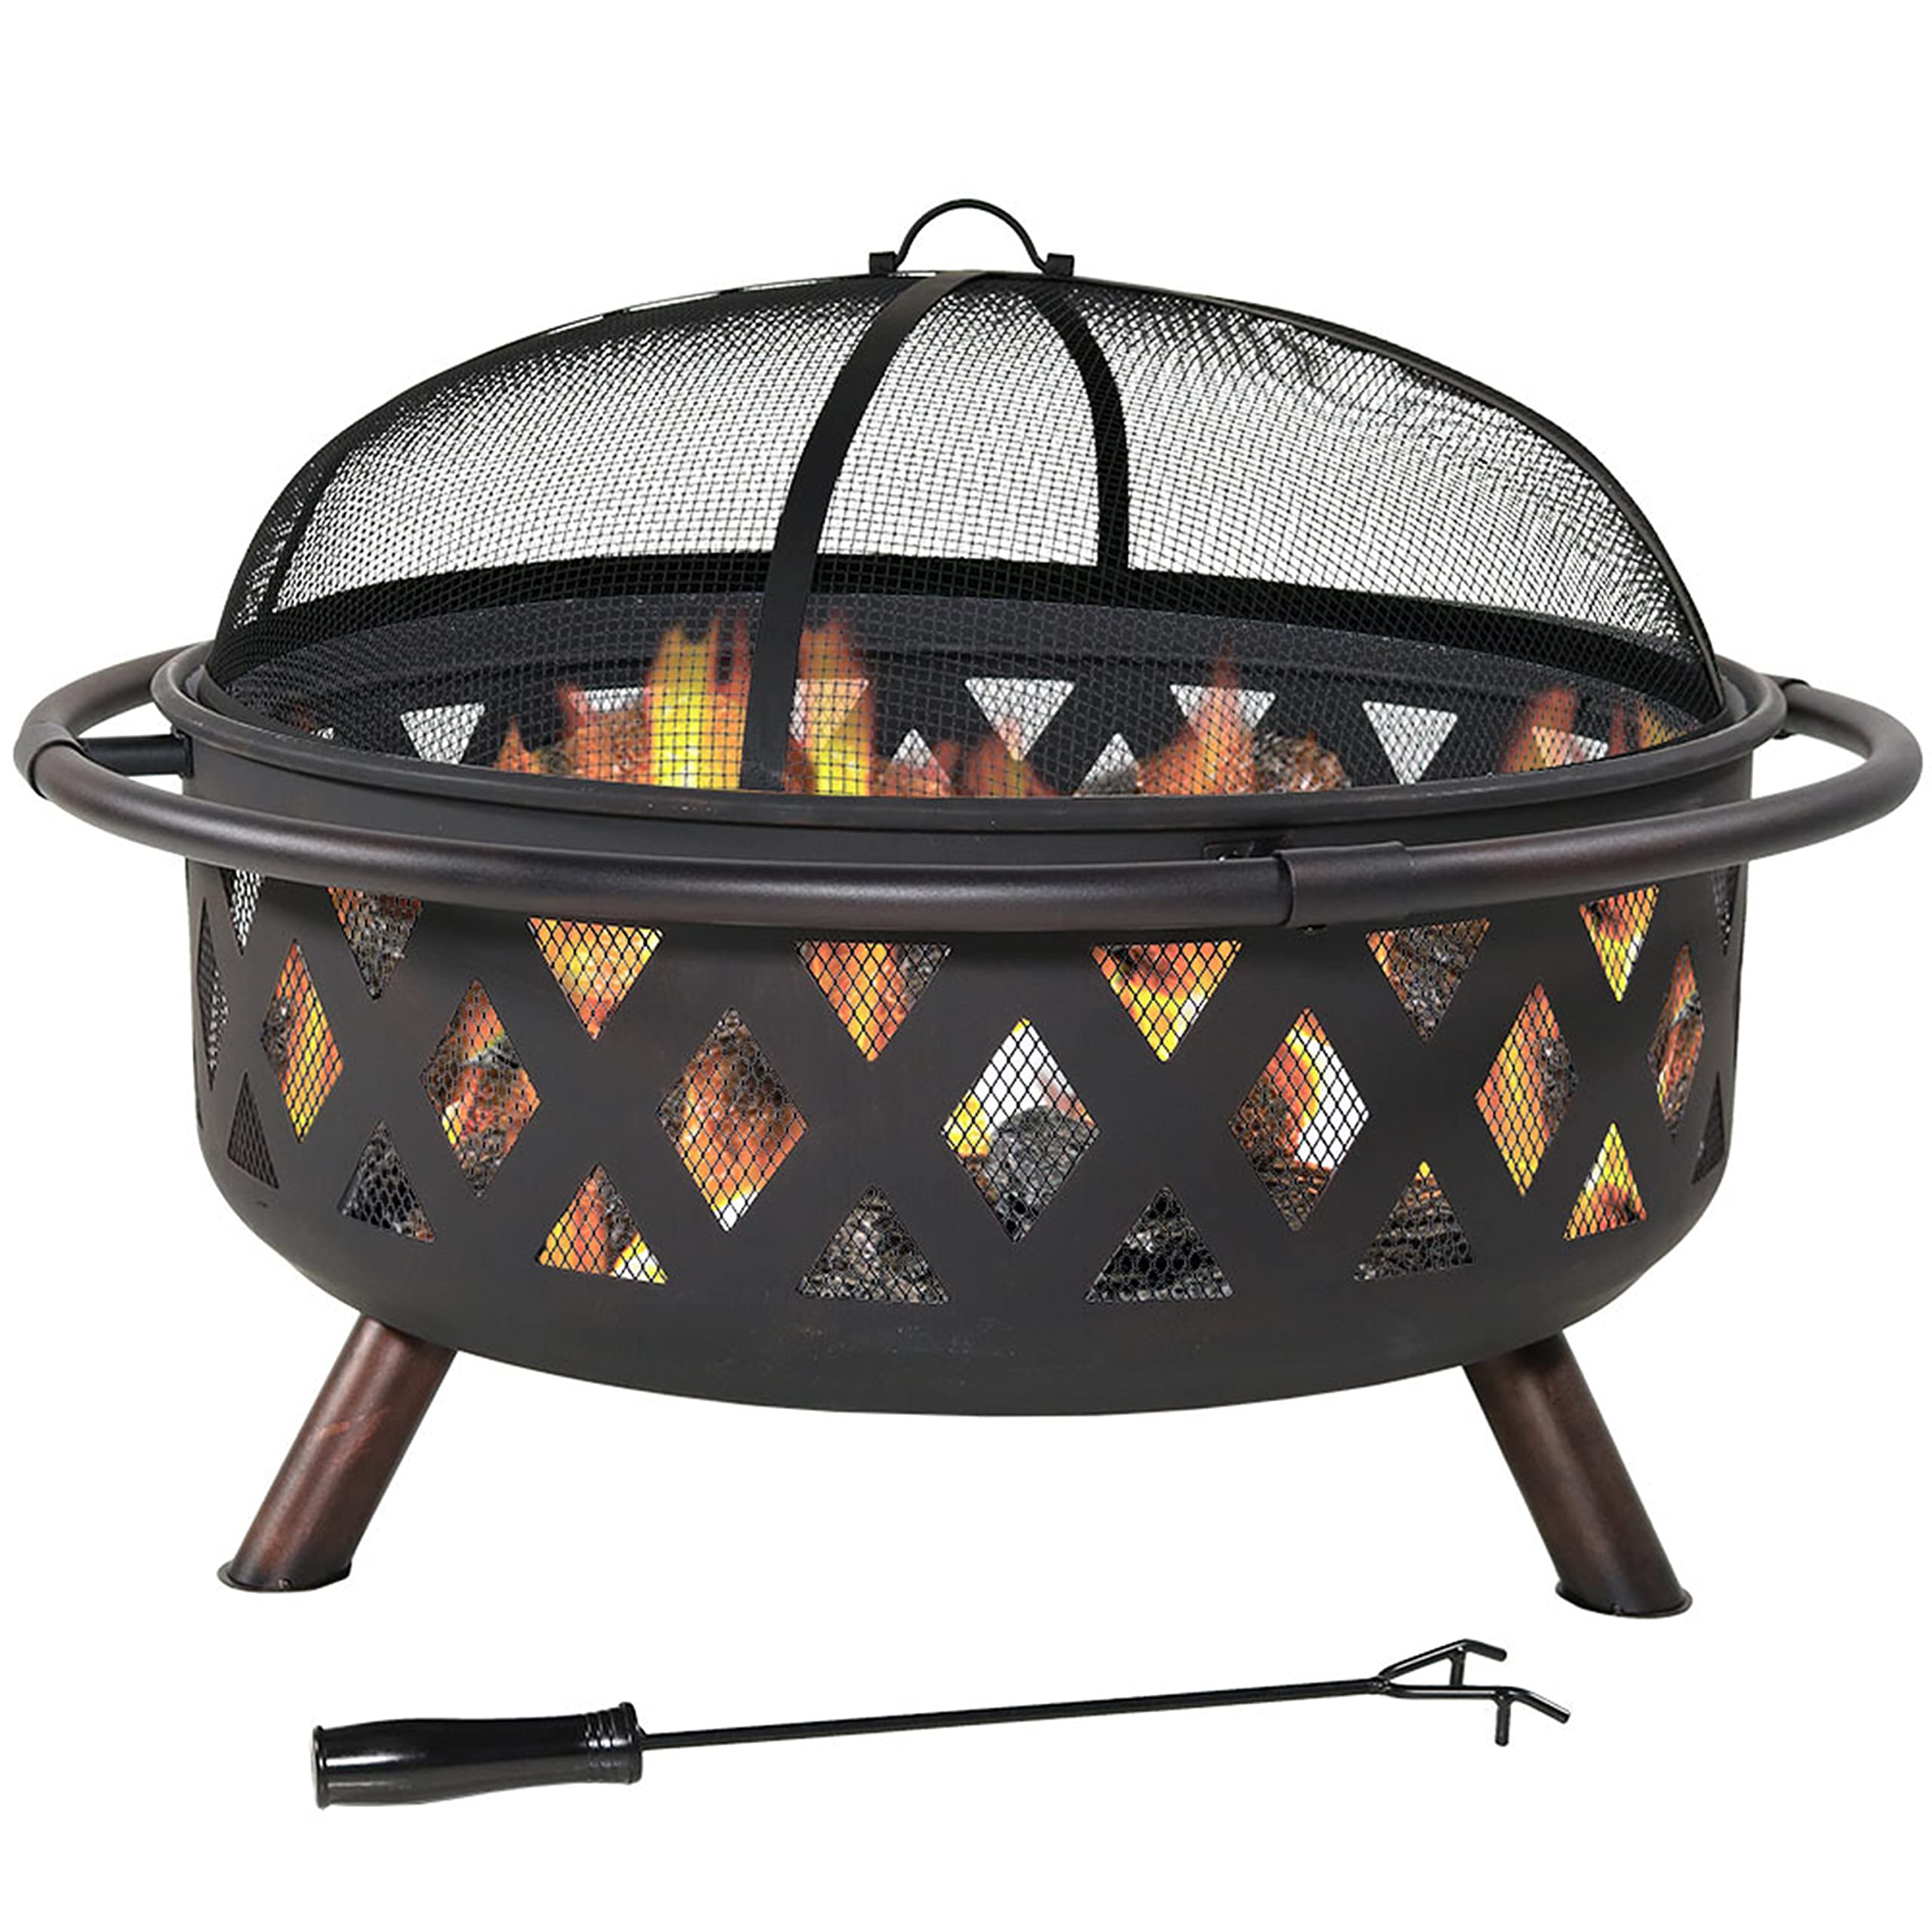
Sunnydaze Decor 36-Inch Heavy-Duty Steel Crosshatch Fire Pit with Spark Screen
$135
6,500+ reviews
36-inch steel bowl with elevated legs that protect your pavers from heat cracking, plus a spark screen and poker included.
Shop on Amazon →Quick Tips for Building a Paver Fire Pit Patio
- Excavate at least 6 inches deep. That gives you 4 inches of gravel base, 1 inch of bedding sand, and the paver thickness. Going shallow is the number one reason patios heave and shift over winter.
- Place the fire pit 10 feet from any structure. That's the standard clearance for a wood-burning fire pit. Measure from the pit edge to your fence, shed, or house wall, not from the patio edge.
- Herringbone pattern hides uneven cuts best. If this is your first paver project, a 45-degree herringbone pattern locks together tightly and makes edge cuts less visible than a running bond or grid layout.
- Slope your patio away from the house. Even on flat ground, build in a 1-inch drop per 8 feet toward the yard. Water pooling under pavers will push them up within a few freeze cycles.
- Wet your paver sand before laying pavers. Lightly misting the bedding sand before you set pavers helps them seat more firmly and reduces how much they shift while you work.
- Seal the pavers the season after you lay them. Give the polymeric sand at least 60-90 days to cure and harden, then apply a penetrating paver sealer. It protects color and prevents efflorescence without leaving a shiny finish.
Frequently Asked Questions
How much does it cost to build a paver fire pit patio yourself?
A 10x10 DIY paver patio typically runs $400-$900 in materials depending on paver type. Concrete pavers are the most affordable at $1-3 per square foot. Add the fire pit and you're usually under $1,000 total for the whole project.
What size paver patio do I need around a fire pit?
A 12x12 patio is the practical minimum for six chairs with comfortable spacing around a standard 30-36 inch fire pit. If you want more generous seating or a sectional, 14x14 gives you better flow without feeling cramped.
Do I need a permit to build a paver patio with a fire pit?
Paver patios usually don't require permits since they're not permanent structures. The fire pit may require a burn permit in some municipalities, especially for wood-burning models. Check with your local fire department before your first burn.
Can I put a fire pit directly on pavers or does it need to be elevated?
You need some air gap. Direct contact between a hot fire pit and concrete pavers causes thermal stress cracking over time. Use a fire pit pad, a heat shield, or a pit with legs that lifts the bowl at least 3-4 inches above the surface.
How long does a DIY paver patio take to build?
A 10x10 patio is typically a two-weekend project for one person or a single weekend with two people. Day one is excavation and base work. Day two is laying pavers. Polymeric sand goes in on day two after everything is set.