How to Build a DIY Paver Walkway in Your Backyard
A paver walkway turns a muddy garden path into something that looks like it cost twice what you paid, and the whole thing is genuinely doable in a weekend if you plan it right.
Most DIY walkways that crack or shift within a year failed at the base prep stage, not because of bad pavers. Spend 60 percent of your time on the foundation and the rest goes quickly.
A 3-foot-wide by 20-foot-long path is the perfect first project. It's enough to make a real difference in your yard without turning into a month-long ordeal. This guide covers every step in order.
Best Hand Tamper for Compacting Your Gravel Base
The base is everything. Standard builds call for 4 inches of compacted crushed gravel before your bedding sand even goes down, and loose gravel that wasn't properly tamped will shift the moment the ground freezes and thaws. For a walkway under 50 feet, you don't need to rent a plate compactor. A quality hand tamper is enough and costs less than $35.
The True Temper 1502600 has an 8x8 inch steel tamping head and a long hardwood handle that keeps the impact away from your wrists. Work in 2-inch lifts: add gravel, tamp firmly across the whole surface, add more, tamp again. It takes time but this is the step that separates a walkway lasting 20 years from one that sinks after the first winter.

True Temper 1502600 Hand Tamper with Hardwood Handle
$29
3,200+ reviews
Solid steel tamping plate with a comfortable hardwood handle built specifically for base prep work like this.
Shop on Amazon →Best Weed Barrier to Lay Under Your Bedding Sand
Landscape fabric between your gravel base and your bedding sand does two things: it keeps weeds from pushing up through the joints and stops the sand layer from gradually migrating down into the gravel over years of foot traffic. Skipping it saves you $35 now and costs you a lot more time in maintenance later.
AGFABRIC's 3-ounce woven landscape fabric holds up under foot traffic without blocking drainage, which is important because standing water under pavers accelerates base failure. The 4-foot by 100-foot roll is a practical size for a standard garden path and gives you enough extra to line adjacent planting beds at the same time. Overlap any seams by 6 inches and pin them flat before adding sand.
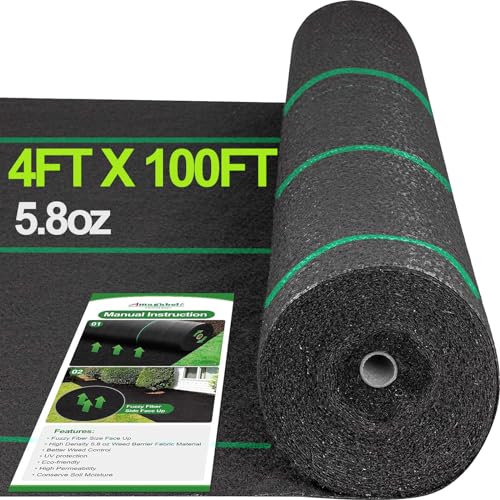
AGFABRIC Heavy Duty Weed Barrier Landscape Fabric 4ft x 100ft
$36
9,400+ reviews
3-oz woven fabric that blocks weeds and holds your sand layer in place without trapping water under the pavers.
Shop on Amazon →Best Rubber Mallet for Setting Pavers Level
You will use a rubber mallet on every single paver, sometimes several times, and your wrist will know the difference between a balanced tool and a cheap one by the end of day one. A good mallet seats the paver into the bedding sand without cracking it, and the right weight gives you control without over-driving stones below grade.
The TEKTON 30312 is 16 ounces with a fiberglass handle that absorbs impact instead of sending it up your arm. It's balanced well enough to swing one-handed, which matters when your other hand is holding a level. This is a tool you'll reach for long after the walkway is done. Under $20 and built to last.
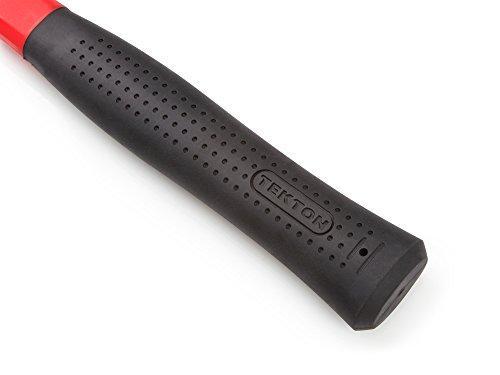
TEKTON 30312 16 oz. Rubber Mallet, Fiberglass Handle
$18
14,600+ reviews
A well-balanced 16-oz rubber head with a fiberglass handle that won't transfer shock the way cheap wood handles do.
Shop on Amazon →Best No-Dig Edging to Keep Your Walkway from Spreading
Without edge restraints, the outer rows of a paver walkway migrate outward over time. Gaps open up between stones and the whole thing starts looking like a puzzle that got kicked. Edge restraints lock the perimeter in place and give your path a clean finished border that actually stays there.
Dimex EasyFlex No-Dig Landscape Edging is flexible enough to follow gentle curves, which is what makes it worth choosing over rigid plastic edging for most backyard paths. The included steel spikes drive straight down through the edging and into the ground without any digging. The 100-foot kit handles a 25-foot walkway along both sides with plenty left over. It's rated for commercial use and holds its shape through freeze-thaw cycles that crack cheaper alternatives by spring.
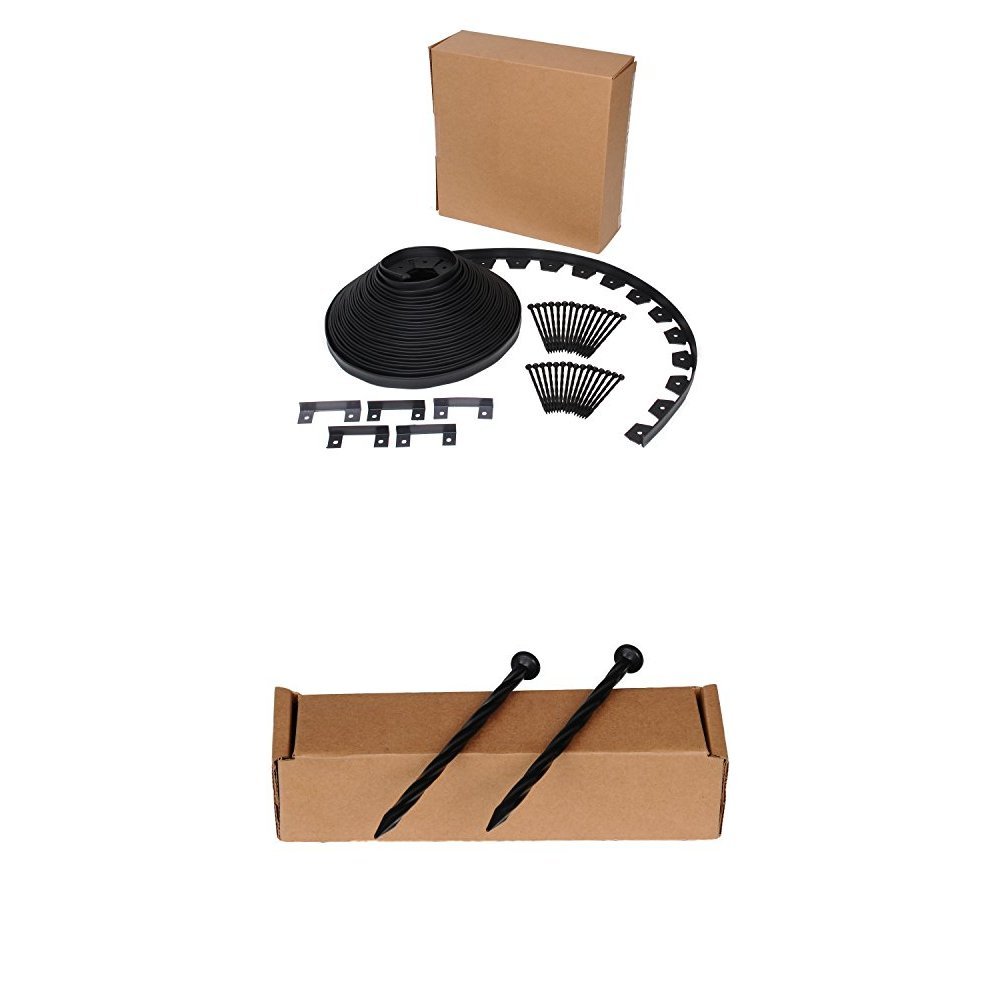
Dimex EasyFlex No-Dig Plastic Landscape Edging Kit, 100 Foot
$27
5,800+ reviews
Flexible no-dig edging with included spikes that installs in minutes and holds your paver border firmly through winter.
Shop on Amazon →Best Polymeric Sand for Locking Your Joints
Regular sand in your paver joints washes out after the first heavy rain and invites every weed seed that blows through. Polymeric sand contains a polymer binder that activates with water and hardens the joints so they resist erosion, ants, and weeds. It's the last step and the one that makes the whole project look finished.
Techniseal HP Polymeric Sand is a standard choice for both pros and serious DIYers. A 50-pound bag covers roughly 40 to 50 square feet of paver surface with 3/8-inch joints, enough for a typical 3x20 walkway. Sweep it dry into every joint, compact one final time to seat it, then mist the surface with water to activate the binder. Give it 24 hours without foot traffic and the joints will feel almost like grout.
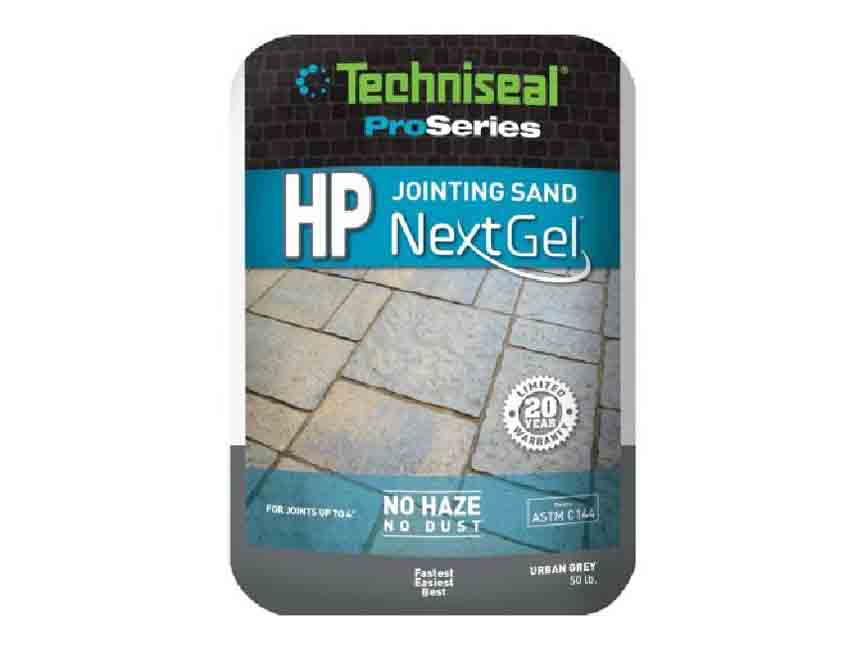
Techniseal HP Polymeric Sand for Paver Joints, 50 lb
$44
2,600+ reviews
Professional-grade jointing sand that hardens when wet to resist washout, weed growth, and insect intrusion in any climate.
Shop on Amazon →Quick Tips for a Paver Walkway That Actually Lasts
- Dig deeper than you think you need to. Plan for 6 to 8 inches total depth: 4 inches of compacted gravel, 1 inch of bedding sand, and the paver thickness. Cutting this short is the most common reason DIY walkways fail within a few years.
- Build a slight slope away from your house. Aim for about 1/8 inch of drop per foot of walkway length, sloping away from any structures. This keeps rain draining outward instead of pooling against your foundation.
- Use a string line to stay straight. Drive stakes at each end and stretch mason's line tight between them. Check your paver edges against the line as you work. Five minutes of setup saves hours of correcting a drifted course.
- Rent a wet saw if more than 20 percent of your pavers need cutting. A cold chisel and hammer can get you through a few edge cuts, but a wet tile saw ($40 to $60 for a day rental) makes trimmer cuts faster and keeps pavers from cracking unpredictably.
- Compact the whole surface before adding polymeric sand. After all pavers are set, run the hand tamper over the entire surface one more time. This seats everything evenly and opens the joints slightly so the polymeric sand sweeps in cleanly.
- Check the forecast before activating your jointing sand. Polymeric sand needs 24 to 48 hours to cure after the final misting step. A hard rain before it sets washes the binder out of the joints and you'll have to redo the whole finish step.
Frequently Asked Questions
How deep do I need to dig for a backyard paver walkway?
Plan on removing 7 to 8 inches of soil below finished grade. That accounts for 4 inches of compacted gravel base, 1 inch of bedding sand, and a standard 2-inch-thick paver. Thicker pavers mean adjusting your excavation depth accordingly.
Can I install a paver walkway without renting a plate compactor?
Yes, for a walkway under 40 to 50 linear feet a hand tamper works well. You compact in 2-inch layers the same way, it just takes more time and effort. Plate compactors start making real sense for larger patios or driveways.
How do I keep weeds from growing between my pavers?
Polymeric sand in the joints hardens when wet and creates a surface that's hostile to weed seeds. Landscape fabric under your gravel base adds a second line of defense against weeds pushing up from the soil below.
How many pavers do I need for a 3-foot by 20-foot walkway?
A 3x20 path is 60 square feet. Standard 12x12 inch pavers cover 1 square foot each, so plan on 66 to 70 to account for cuts and a 10 percent waste allowance. Measure your specific pavers and recalculate if they're a different size.
How long will a DIY paver walkway last?
A well-built paver path with a properly compacted gravel base can last 25 to 30 years. The pavers themselves are nearly indestructible. What degrades is the base underneath, which is why the gravel prep and compaction steps are worth doing right the first time.