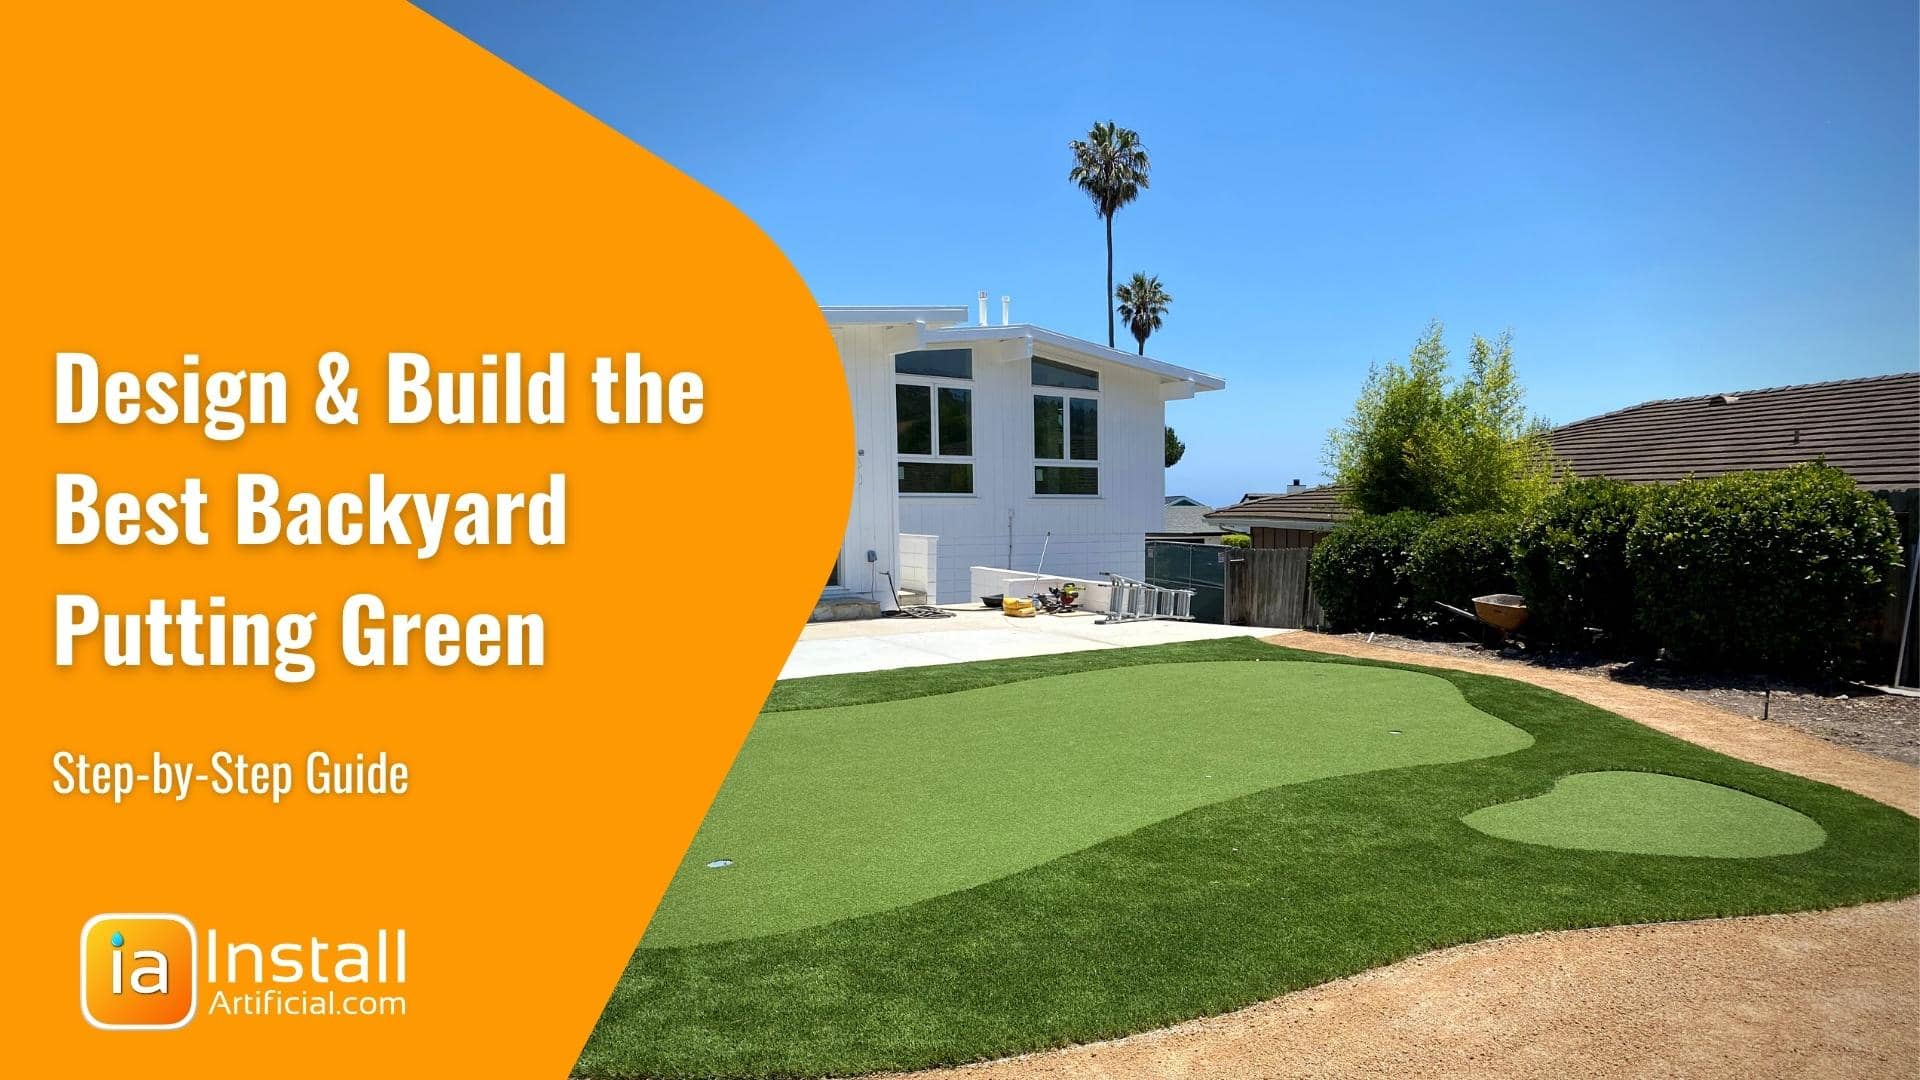
How to Build a Backyard Putting Green
You can build a solid 10x15 foot backyard putting green in a single weekend for around $300. The key is knowing which materials actually matter and which shortcuts make the whole thing look cheap two seasons in.
Most of the work is in the base prep. Get that right and the turf goes down fast, the cups sit flush, and the surface rolls true. Skip it and you will be dealing with bumps and weeds pushing through before the summer is over.
This guide covers the full install from ground prep to final flag, plus the five products that make the biggest difference in how your green turns out.
Best Turf Kit for a DIY Backyard Green
GoSports makes the most complete putting green kit for home installs in this price range. The 5x10 version gives you 50 square feet of surface with pre-fitted practice cups already included, which means you are not sourcing hardware separately just to get started. It is enough room to work on chips, short putts, and approach shots from multiple angles.
The turf pile is specifically engineered for putting, not for lawns or pet areas. The shorter, denser fibers give you a consistent ball roll that actually translates to real practice on a course. It also holds up in full sun without fading, which matters if your yard faces south and bakes from late morning on.
For larger builds, GoSports offers bigger sizes. But the 5x10 is the right starting point for most backyards. You can add a second panel with seaming tape if you want to expand, which is a much easier path than trying to cut down an oversized piece you bought too large.
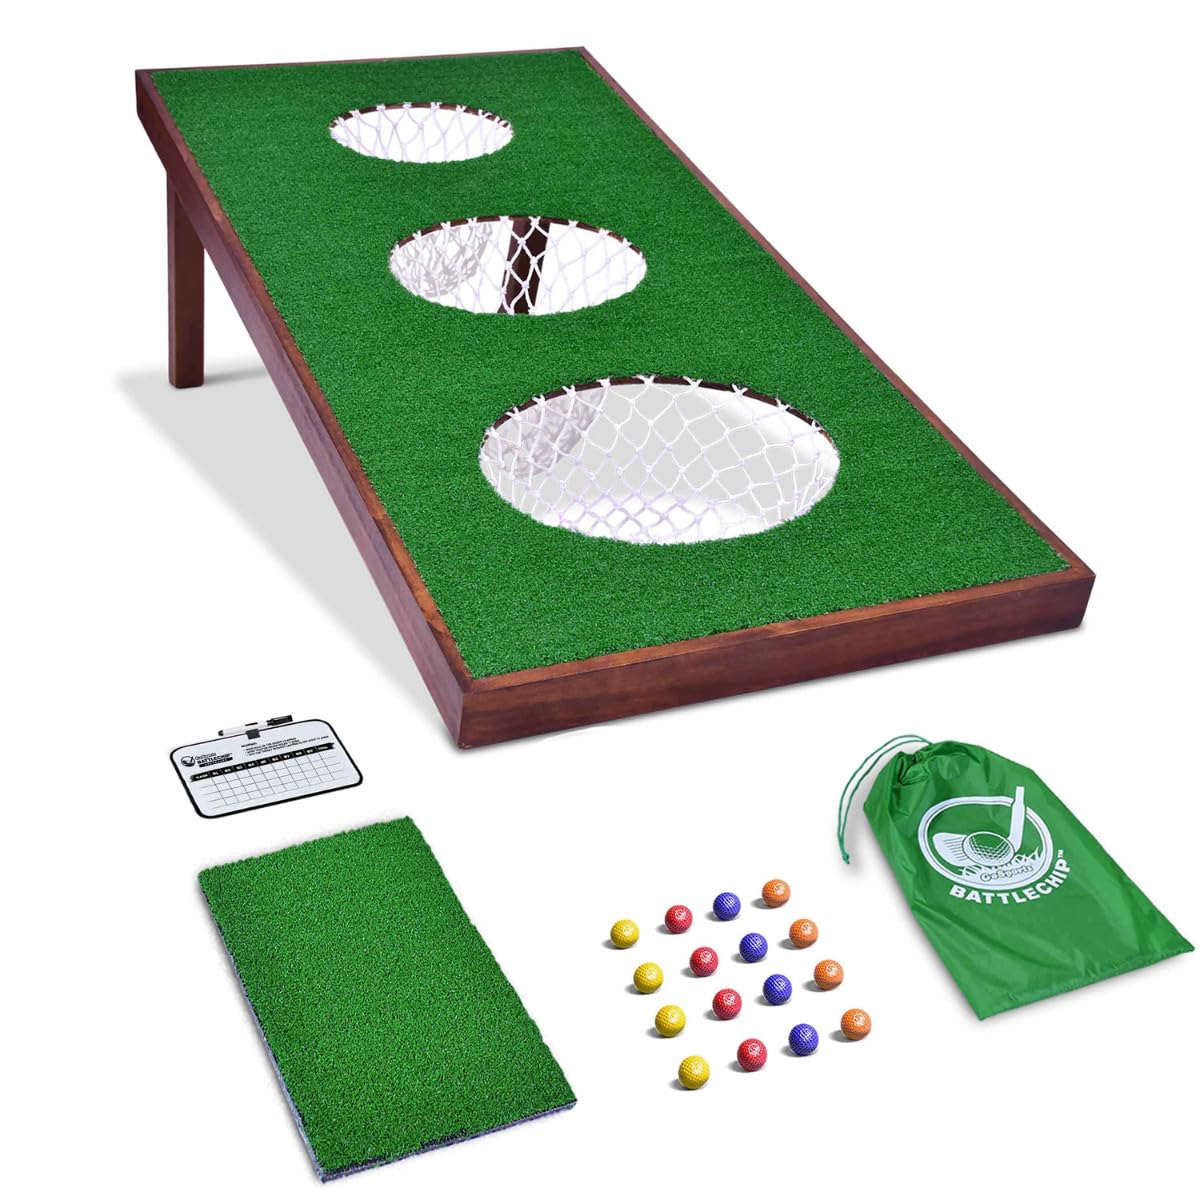
GoSports Premium Golf Putting Green (5 ft x 10 ft)
$189
3,200+ reviews
A purpose-built putting surface with pre-fitted cups, true ball roll, and UV-resistant turf built to handle real outdoor conditions.
Shop on Amazon →Best Putting Cups for Custom Hole Placement
If you are building a larger green or want holes in specific locations that do not match what a kit provides, you need cups you can place yourself. The Crown Sporting Goods 4-inch regulation cups are the practical choice here. They are regulation depth, sized for standard flagsticks, and a 9-pack covers almost any DIY layout you can plan.
Installing them is straightforward. Cut a circle in the turf with a 4-inch hole saw, drop the cup in, and press the turf edges down around the rim. Done right, the cup sits flush with the surface with no lip or bump around the hole. That detail matters more than you would think if you want realistic practice conditions instead of a glorified carpet.
Spacing holes at least 6 feet apart gives you room for meaningful lag putt practice between them. A 20x10 green with four well-placed cups starts to feel like an actual practice facility rather than a backyard novelty.
Crown Sporting Goods 4-Inch Golf Putting Cups (9 Pack)
$22
1,800+ reviews
Regulation-depth 4-inch plastic cups that install flush with any artificial putting green turf using a standard hole saw.
Shop on Amazon →Best Weed Barrier for the Base Layer
Skipping a weed barrier is the mistake that ruins most first-time builds. Within one season, grass and weeds push up through the turf backing, create uneven bumps under the surface, and destroy the ball path across the green. A quality landscape fabric under the entire footprint prevents that completely without adding meaningful cost.
Agfabric's heavy-duty weed barrier is 3.2 oz professional grade, which is meaningfully thicker than the bargain rolls sold at big box stores. It blocks weeds without trapping moisture, and a 3x100 foot roll is enough material to cover a 15x20 foot green with overlap at every seam.
Lay it over your compacted gravel base, pin it with landscape staples around the perimeter, and cut it slightly oversized so there are no gaps at the edges. This step takes about 20 minutes and protects months of work.
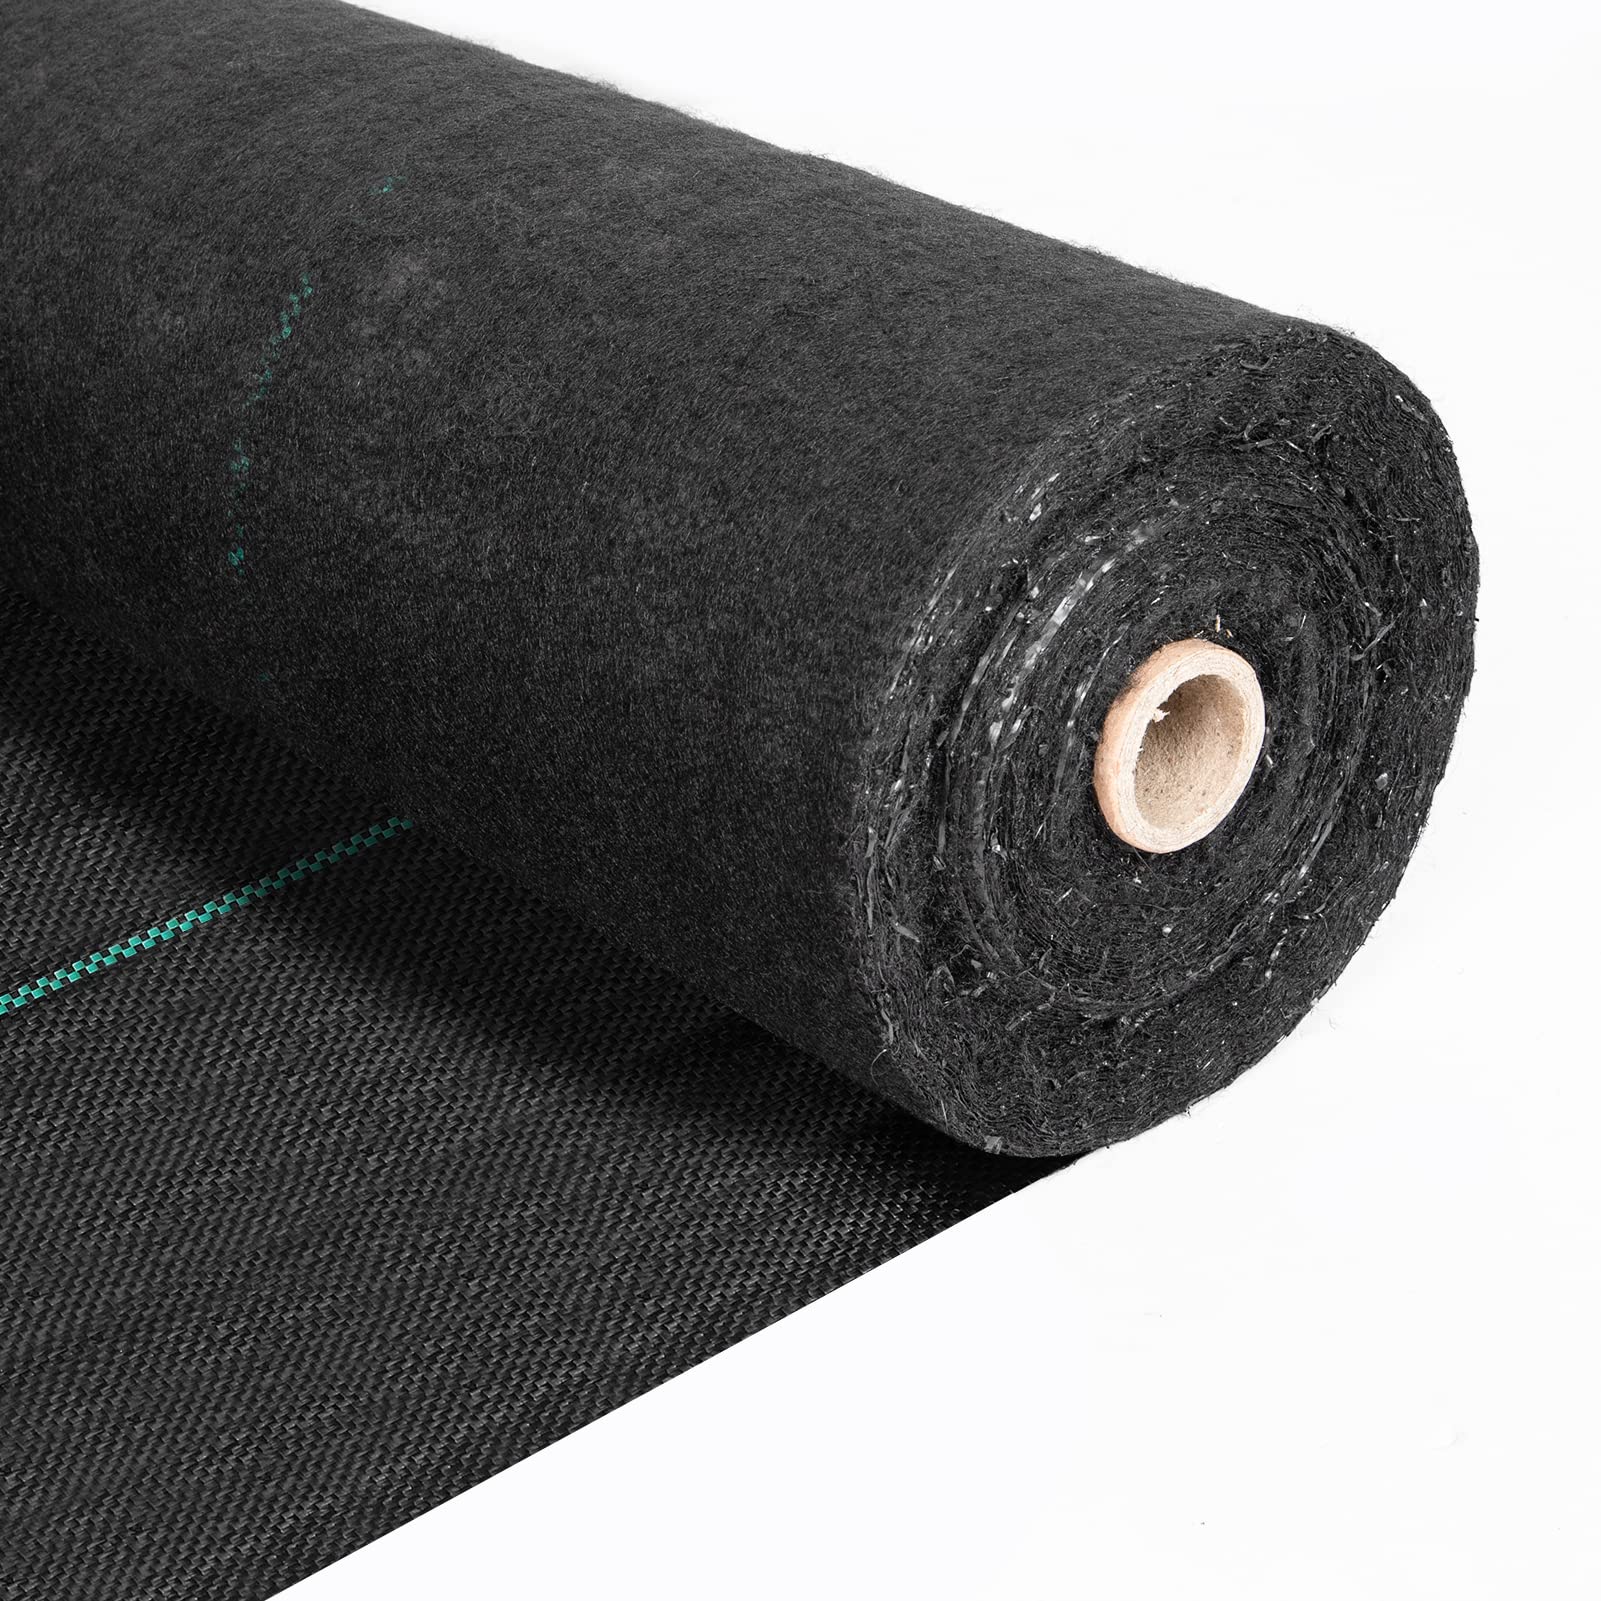
Agfabric Heavy-Duty Weed Barrier Landscape Fabric 3ft x 100ft
$32
4,500+ reviews
Professional 3.2 oz woven landscape fabric that blocks weeds under artificial turf without trapping moisture in the base layer.
Shop on Amazon →Best Edging for Clean Putting Green Borders
The border of your putting green is what separates a finished build from a rolled-out mat. Master Mark Plastics Terrace Board is flexible enough to follow curved or freeform green shapes but rigid enough to hold the turf edge firmly in place through rain, foot traffic, and freezing temperatures. The no-dig stakes that come with it go into most soil types without any special equipment.
You run the edging along the perimeter, push the stakes through the flange into the ground, then fold the turf edge under and secure it to the board with staples. The result is a tight, clean line that does not shift after a hard rain. This is the detail that makes a green look built rather than laid down.
A 40-foot roll handles a roughly 10x10 green with some room left over for irregular shapes. For larger greens, buy two rolls. The edging is also reusable if you ever decide to resize or relocate the green down the road.
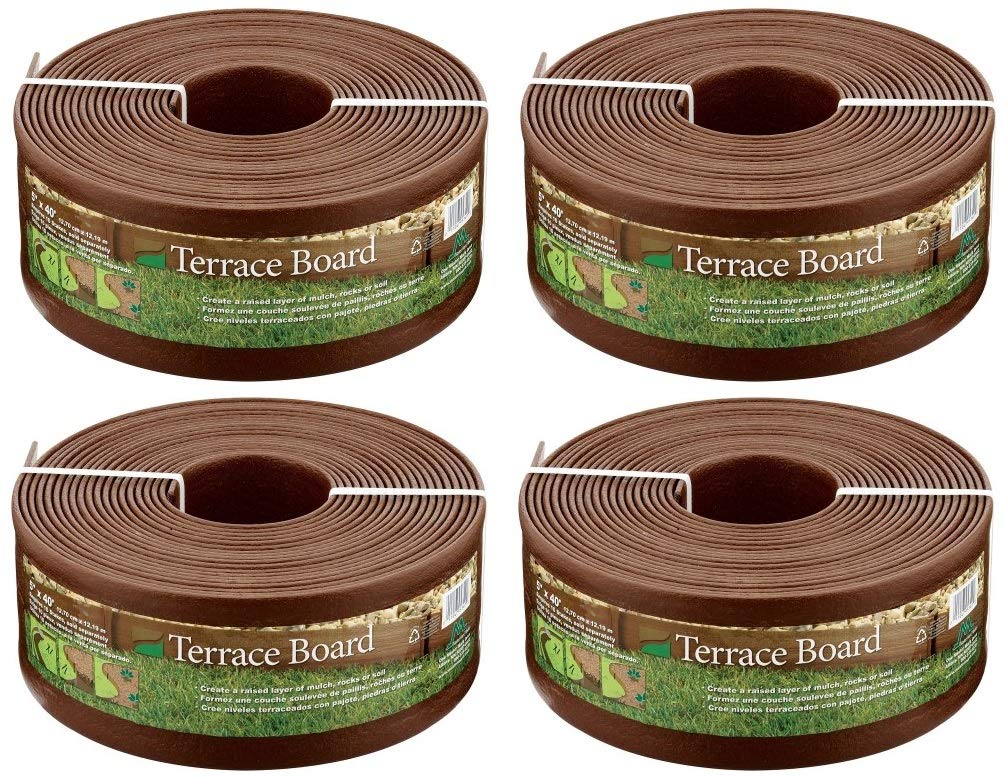
Master Mark Plastics 95340 Terrace Board Landscape Edging 40ft
$38
6,200+ reviews
Flexible, no-dig plastic landscape edging that locks putting green borders in place on any turf shape without moving over time.
Shop on Amazon →Best Training Aid to Use on the Finished Green
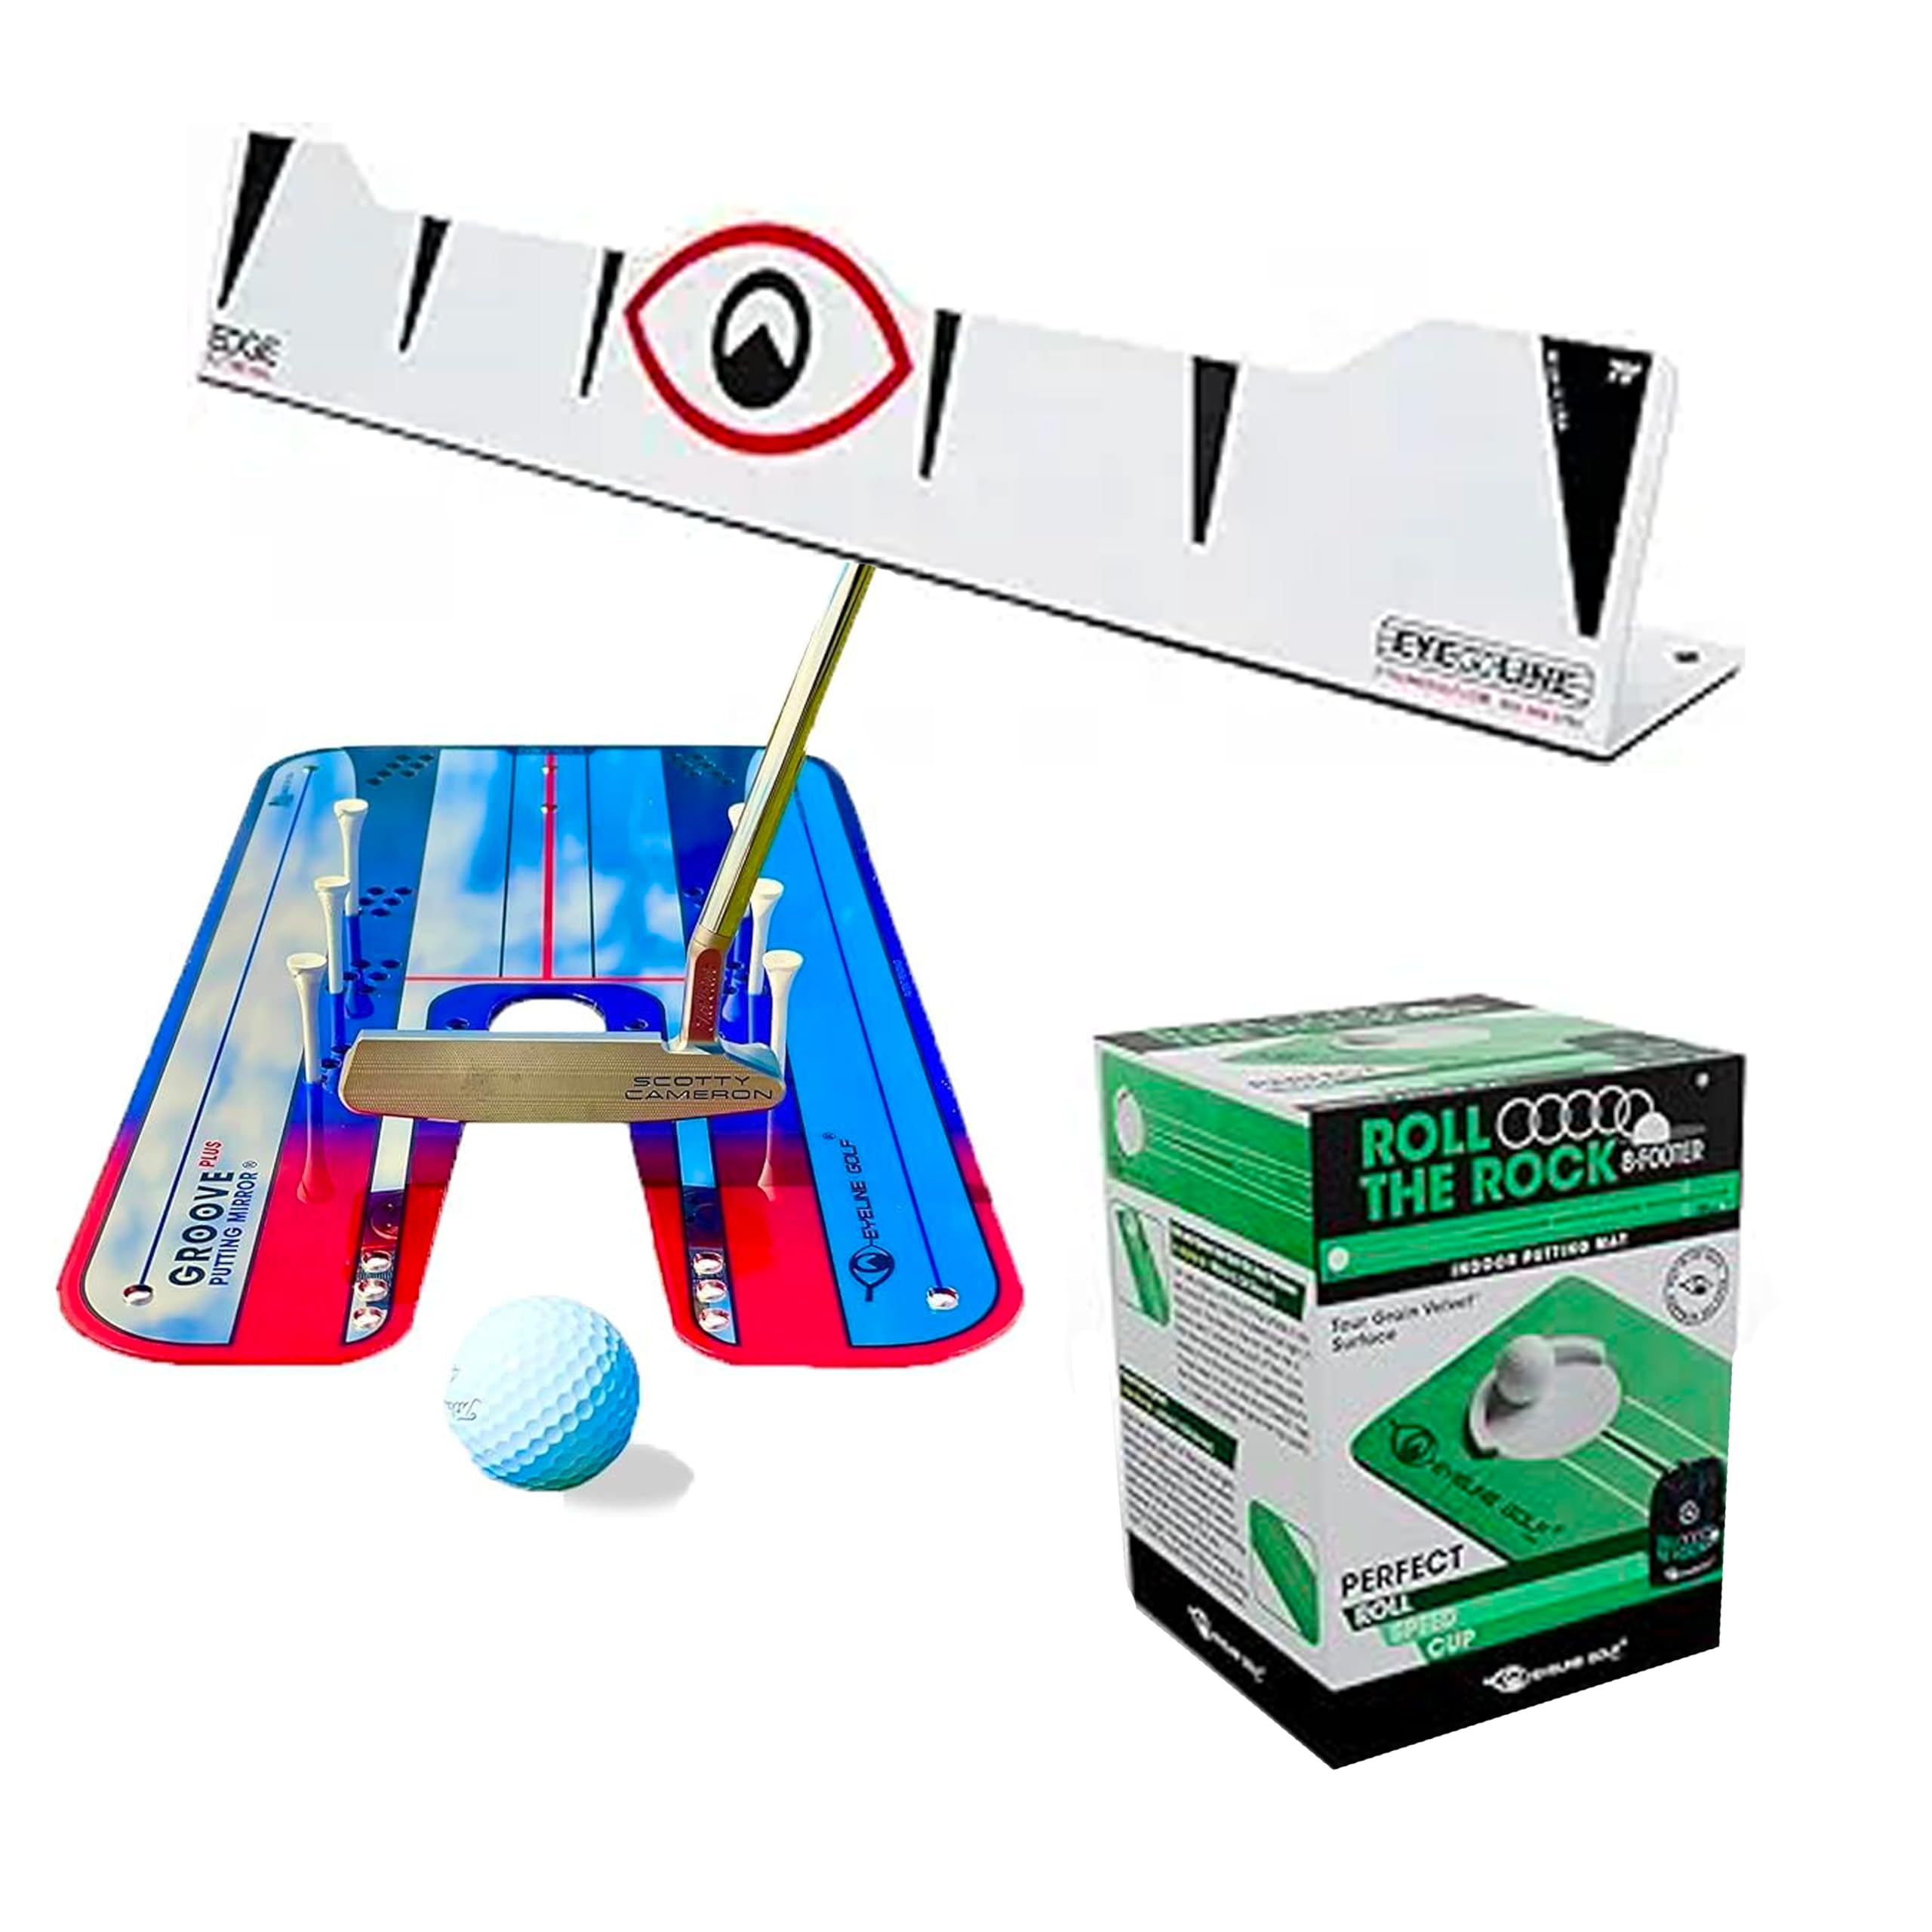
Once the green is in and the cups are placed, the EyeLine Golf Groove Putting Mirror converts backyard rolling into actual skill work. It lies flat on the turf surface and shows you in real time whether your eyes are positioned correctly over the ball and whether the putter face is square at address. Those are the two things most amateurs never fix because they cannot see them without an external reference.
This is the difference between practicing your putting stroke and ingraining your putting stroke. You can roll 50 balls a day without a mirror and reinforce a crooked path the entire time. Ten focused strokes with the Groove and you start building feedback that sticks.
Set it up 6 feet from one of your cups, lock in your setup, then move back to 10 and 15 feet and repeat. After a few sessions you will notice the stroke starting to feel automatic in a way that carries over to actual rounds.
EyeLine Golf Groove Putting Mirror
$34
8,400+ reviews
A flat training mirror that gives instant feedback on eye position and putter face angle, turning casual putting practice into purposeful repetition.
Shop on Amazon →Quick Tips for Building a Backyard Putting Green
- Start with 4 inches of compacted crushed gravel. A base of 3/4-inch crushed stone creates drainage and a firm, level foundation that prevents the turf from sinking or shifting underfoot over time.
- Let the turf acclimate before cutting. Unroll the turf and let it sit in the sun for at least an hour. It relaxes the backing and lays significantly flatter, making cuts and cup holes much easier to line up.
- Cut your cup holes before securing the edges. Mark and drill the cup openings while the turf is still loose. Trying to cut them after the perimeter is locked down is harder and risks pulling the surface off alignment.
- Add a 1 to 2 percent slope across the green. A perfectly flat green is actually less useful for practice. A gentle grade gives you realistic break to read and makes the green feel more like an actual putting surface.
- Brush the turf fibers after installation. Use a stiff push broom to stand the fibers upright before first use. This improves ball roll consistency and removes flat spots left over from the turf being rolled in packaging.
- Keep your first build to 15x15 feet or under. Larger greens require more precise base leveling to avoid dead spots. Get the installation right at a manageable size, then expand with a second panel if you want more room.
Frequently Asked Questions
How much does it cost to build a backyard putting green?
A 10x15 foot DIY putting green typically runs between $250 and $500 depending on the turf kit you choose and whether you already have base gravel. The turf is the biggest line item, followed by edging and cups.
What base do you need under artificial putting green turf?
Four inches of compacted 3/4-inch crushed gravel is the standard base. It drains well, compacts firm, and gives the turf a stable surface that resists settling. A layer of decomposed granite on top smooths it out before you lay the weed barrier.
How do you install putting cups in artificial turf?
Use a 4-inch hole saw to cut through the turf and into the base material. Drop the cup in, press the turf edge flat around the rim, and make sure the cup sits flush with the surface. Any lip or bump around the hole will throw off putts from close range.
Will a DIY putting green give you real practice?
Yes, if the turf pile is short and dense and the base is properly leveled. A well-built green rolls consistently and gives you realistic speed and break that carries over to course conditions.
How long does a backyard putting green last?
Quality artificial turf built for putting typically lasts 10 to 15 years with normal use. Keeping it brushed, rinsed clean a few times per season, and protected from heavy off-season foot traffic extends that considerably.